


OpenVPN ALS (Adito), an open source web gateway. Easily install and configure OpenVPN ALS. Requirement: CentOS 6.x distribution.
Real-world use case
You're looking for an open source web VPN gateway for your remote access: here's how to install OpenVPN ALS (Adito) on CentOS 6.5.
OpenVPN ALS is a fork of ssl-explorer, it's a remote access solution that lets users access their local network via a secure web interface developed in Java.
This kind of tool requires special attention to security, since it exposes your LAN.
This article is based on OpenVPN ALS's official wiki.
Installing the prerequisites
Installing the Java build tool on CentOS:
yum install ant
Installing the open source version of Java:
yum install openjdk
Configuring Java:
alternatives --config java
There are 3 programs that provide java, we're currently on version 1.7.0:
Selection    Command
-----------------------------------------------
*  1           /usr/lib/jvm/jre-1.7.0-openjdk.x86_64/bin/java
   2           /usr/lib/jvm/jre-1.5.0-gcj/bin/java
   3           /usr/lib/jvm/jre-1.6.0-openjdk.x86_64/bin/java
For OpenVPN ALS to work, select java version 1.6.0 (option 3 here).
Installing OpenVPN ALS (Adito)
Downloading OpenVPN-ALS Adito:
wget http://sourceforge.net/projects/openvpn-als/files/adito/adito-0.9.1/adito-0.9.1-bin.tar.gz/download
Extracting the archive:
tar xvzf adito-0.9.1-bin.tar.gz
Moving into the folder:
cd adito-0.9.1
Starting the installation:
ant install
Buildfile: build.xml

set-tools:

check-tools:
     [echo] Couldn't find tools.jar from $ADITO_HOME/adito/lib
     [echo] Copying the tools.jar from your JDK
     [copy] Copying 1 file to /root/adito-0.9.1/lib

check-permissions:

install: y
     [java] Starting installation wizard.Point your browser to http://ip_address:28080.
java
java Press CTRL+C or use the 'Shutdown' option from the web interface to leave the installation wizard. java …………. BUILD SUCCESSFUL Total time: 4 minutes 34 seconds
Java tells us that, to continue the installation, we need to launch our browser at:
http://your_ip:28080.
For reference, you'll need to open port "28080" with iptables:
iptables -A INPUT -p tcp -m tcp --sport 28080 -j ACCEPT
The rest happens in your browser and on OpenVPN-ALS's web installation interface.
Web interface: OpenVPN-ALS (Adito)
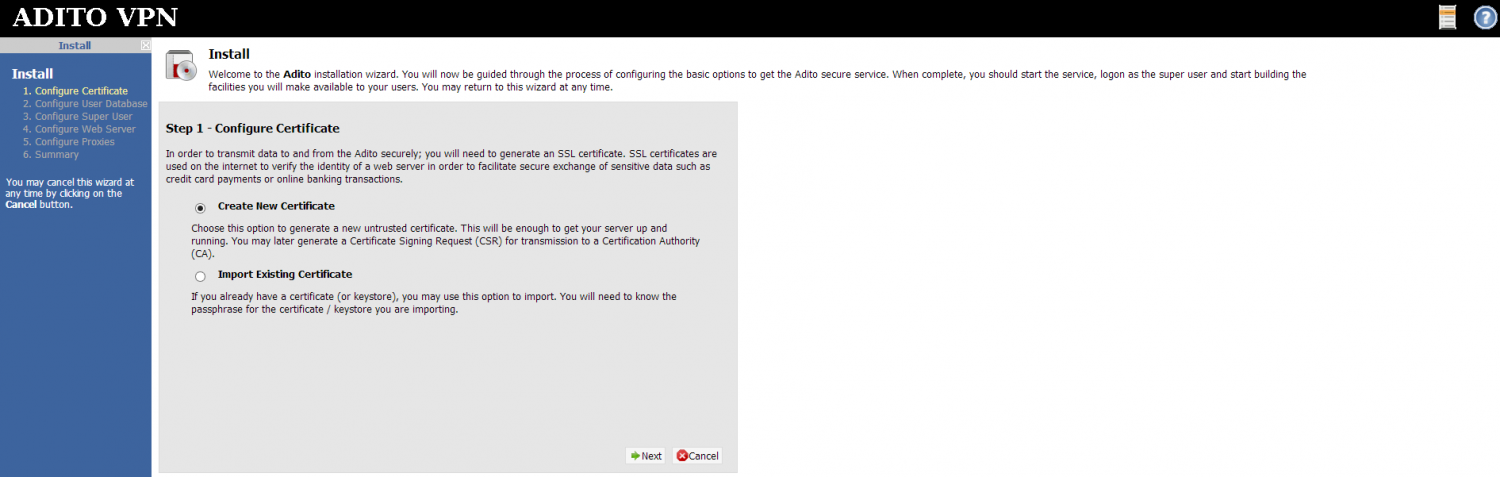
The first contact with the interface, creating the certificate:
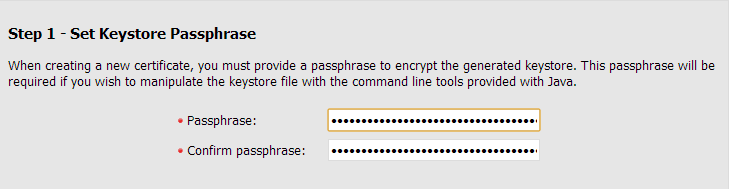
Next, you need to choose a "passphrase":
The following window shows the certificate creation (example):
- Hostname: vpn.kassianoff.fr
- Organisational Unit: IT
- Company: kassianoff
- City: Lyon
- State: Rhône-Alpes
- Country Code: FR
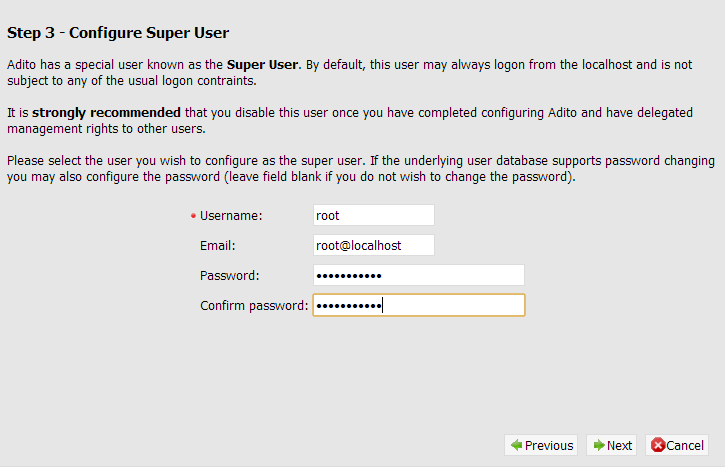
Once this step is done, click "Next" and configure the superuser's settings:
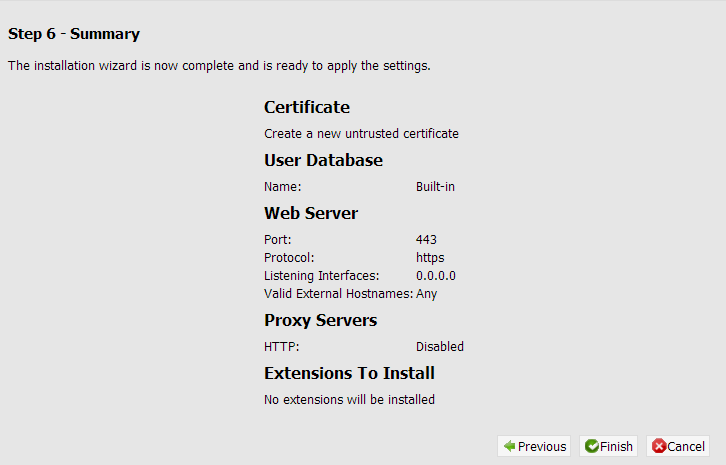
Once at step 4: leave the port on https (443) and the "ALL" interface in "Allow" mode.
You can change the client permissions (optional).
Step 5 takes you to proxy usage: check the box or not.
The end of the installation gives you a summary of all your choices:
https://content.kassianoff.fr/capture\_adito\_05.pngg
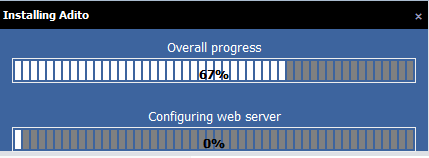
The web interface installation ends with the following message:
Installer Complete : "The adito installer is exiting. [...] you may then start the Adito service.
The services: OpenVPN-ALS (Adito)
For OpenVPN ALS to work fully, you need to install the service with the command:
ant install-service
Buildfile: build.xml

set-tools:

check-tools:

check-permissions:

install-service:
     [echo] Installing Adito as Linux service
     [exec] Detecting Java
     [exec]      Using /usr/lib/jvm/java-1.6.0-openjdk-1.6.0.0.x86_64/jre
     [exec] Detected OS redhat (x86-64)
     [exec] /root/adito-0.9.1/install/platforms/linux/install-service: line 12: /root/adito-0.9.1/conf/wrapper.conf: No such file or directory
     [exec] Service installed
     [echo] Adito installed as Linux service

BUILD SUCCESSFUL
Total time: 0 seconds
Now that the service is installed, start it:
/etc/init.d/adito start
or
ant start
Starting Adito...

/root/adito-0.9.1/install/platforms/linux/adito: /root/adito-0.9.1/install/platforms/linux/x86/wrapper: /lib/ld-linux.so.2: bad ELF interpreter: No such file or directory

/root/adito-0.9.1/install/platforms/linux/adito: line 213: /root/adito-0.9.1/install/platforms/linux/x86/wrapper: Success
If you get the error message below, install "glibc":
yum -y install glibc.i686
Restart the service:
ant start
Buildfile: build.xml

create-wrapper-conf:
     [copy] Copying 1 file to /root/adito-0.9.1/conf
     [echo] Creating wrapper configuration dynamically
echo
echo Java executable: /usr/lib/jvm/java-1.6.0-openjdk-1.6.0.0.x86_64/jre/bin/java echo Wrapper directory: install/platforms/linux/x86 set-tools: check-tools: check-permissions: start: exec Starting Adito… exec /root/adito-0.9.1/install/platforms/linux/adito: /root/adito-0.9.1/install/platforms/linux/x86/wrapper: /lib/ld-linux.so.2: bad ELF interpreter: No such file or directory exec /root/adito-0.9.1/install/platforms/linux/adito: line 213: /root/adito-0.9.1/install/platforms/linux/x86/wrapper: Success exec Result: 1 echo Adito started BUILD SUCCESSFUL Total time: 0 seconds
Don't forget the iptables rule on port "443":
iptables -A INPUT -p tcp -m tcp --sport 443 -j ACCEPT
The server's web interface: https://ip\_address (or your domain name)

More articles will follow very soon on:
- Adding Java applications and configuring ssh, rdp, vnc connections.
- Creating SSH tunnels, web forwarding, user management.
- Securing your infrastructure specifically for OpenVPN ALS Adito.
Conclusion
I've detailed here the installation of OpenVPN ALS (Adito) on CentOS 6.5, from preparing the Java environment to configuring the certificate and the service via the web installation interface. This remote access gateway lets users join a local network via a simple, secure web interface, making it a lightweight alternative to a traditional VPN. Special attention needs to be paid to the security of this kind of tool, since it directly exposes the local network to the internet.