


Lost all control of your ESXi 5.x? The solution: reset the root password. Requirement: have an ESXi 5.x host.
Table of contents
Real-world use case
You've lost the root password of your ESXi 5.x host: here's how to reset it without reinstalling.
Have you lost your password, or has a nasty attacker stolen your infrastructure?
No panic, the solution lies in Tux the penguin, in other words: Linux.
A simple Live CD lets you change the "root" login of VMware ESXi 5.x
The steps to change the password
It's important to fully understand the different steps before getting started:
- Download a Linux distribution, for example: Ubuntu LTS 13.04.
- Boot the Live CD with the graphical interface.
- List all the partitions on your disk.
- Isolate and mount your ESXi's root partition.
- Extract the important archives.
- Edit the hypervisor's user file.
- Recompress this new archive and delete the old one.
- Unmount our ESXi's root partition.
- Change the password on the vSphere client.
Downloading a Linux distribution: Ubuntu LTS 13.04
The method works with any distribution. However, I use Ubuntu: why?
Ubuntu offers "gparted", which will let us find our root partition more easily.
To download the Ubuntu distribution: http://www.ubuntu-fr.org/telechargement?action=dl
Booting the Live CD with the graphical interface
Insert and boot your Live CD on the machine where VMware ESXi is installed.
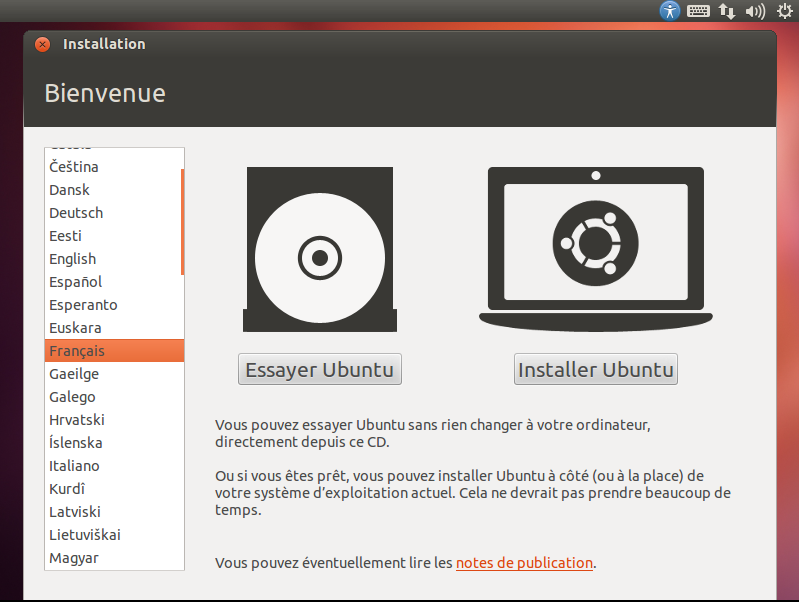
You should see this appear, click "Try Ubuntu":
Listing all the partitions on your disk
Press the "Super" key, or click the launcher at the top left, then search for "gparted":
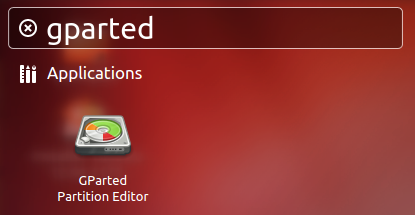
Then select the gparted application, which lets you easily list our partitions:
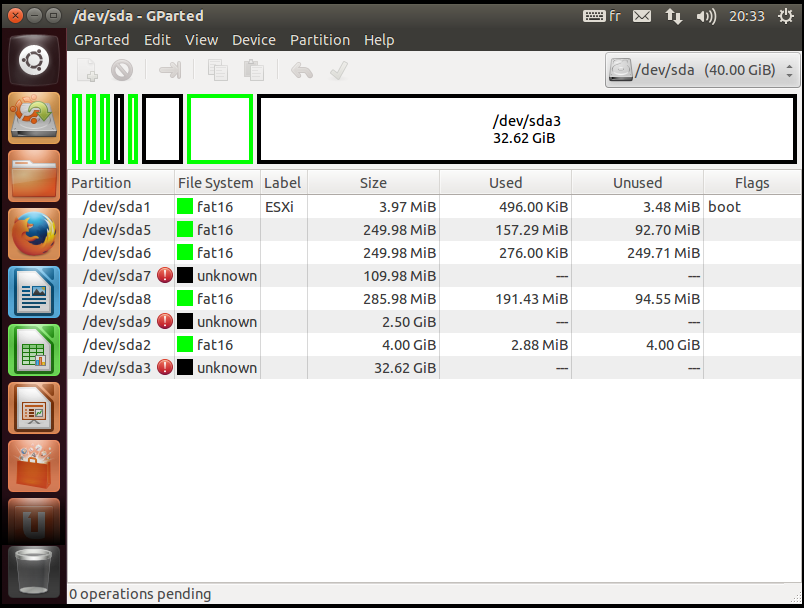
sda1 is used to boot the ESXi 5.x system.
sda5 is used for the entire ESXi 5.x system (in other words, the root).
sda6 is used as a copy of sda5 in case of problems.
sda8 is used for the VMware Tools, holding the VMware Tools and other things.
sda2 is used to store log files.
Isolating and mounting your ESXi's root partition
In the terminal, we'll isolate /dev/sda5 and mount it in a folder:
sudo su
mkdir /mnt/esxi/
mount /dev/sda5/ /mnt/esxi/
cd /mnt/esxi/
In the /mnt/esxi/ folder, we have the entire /dev/sda5 partition with the following files:
a.b00         imgdb.tgz     net_e100.v01  sata_sat.v01  scsi_mpt.v00
ata_pata.v00  ipmi_ipm.v00  net_enic.v00  sata_sat.v02  scsi_mpt.v01
ata_pata.v01  ipmi_ipm.v01  net_forc.v00  sata_sat.v03  scsi_mpt.v02
ata_pata.v02  ipmi_ipm.v02  net_igb.v00   sata_sat.v04  scsi_qla.v00
ata_pata.v03  jumpstrt.gz   net_ixgb.v00  sb.v00        scsi_qla.v01
ata_pata.v04  k.b00         net_mlx4.v00  scsi_aac.v00  state.tgz
ata_pata.v05  lpfc.v00      net_mlx4.v01  scsi_adp.v00  s.v00
ata_pata.v06  lsi_mr3.v00   net_nx_n.v00  scsi_aic.v00  tboot.b00
ata_pata.v07  lsi_msgp.v00  net_tg3.v00   scsi_bnx.v00  uhci_usb.v00
b.b00         misc_cni.v00  net_vmxn.v00  scsi_bnx.v01  user.b00
block_cc.v00  misc_dri.v00  ohci_usb.v00  scsi_fni.v00  useropts.gz
boot.cfg      mtip32xx.v00  onetime.tgz   scsi_hps.v00  weaselin.t00
chardevs.b00  net_be2n.v00  qlnative.v00  scsi_ips.v00  xlibs.v00
ehci_ehc.v00  net_bnx2.v00  rste.v00      scsi_lpf.v00  xorg.v00
elxnet.v00    net_bnx2.v01  sata_ahc.v00  scsi_meg.v00
esx_dvfi.v00  net_cnic.v00  sata_ata.v00  scsi_meg.v01
ima_qla4.v00  net_e100.v00  sata_sat.v00  scsi_meg.v02
Extracting the important archives
In the files listed above, we need "state.tgz", which contains an archive.
This archive is called "local.tgz" and contains the "etc" folder with the well-known "shadow" file.
tar xvzf state.tgz
tar xvzf local.tgz
ls
The "etc" folder appears after extracting the two files:
cd etc/
ls
The contents of the "etc" folder:
chkconfig.db          hosts        resolv.conf  shadow  vmsyslog.conf    vmware
dhclient-vmk0.leases  random-seed  security     ssh     vmsyslog.conf.d
Editing the hypervisor's user file.
We'll now need to edit the file that contains ESXi's user and password.
nano shadow
Here's the inside of the file, with all the default users on ESXi 5.x:
root:$6$1yScI5Q5$aZmwdXKEisjY3n1U2Ct01UUlql1S0dGQlrrPv1/3JOWmWkLOM$km.Ib3Pge3ymRZms0E5YU.n82y.j0:13358:0:99999:7:::
nobody:*:13358:0:99999:7:::
nfsnobody:!!:13358:0:99999:7:::
dcui:*:13358:0:99999:7:::
daemon:*:13358:0:99999:7:::
vpxuser:*:14875:0:99999:7:::
We can now remove the password we lost, to do this, edit the following line to remove the encrypted password:
root::13358:0:99999:7:::
To save and exit the "nano" editor, press "Ctrl + x" at the same time.
Recompressing this new archive and deleting the old one.
Now that our shadow file is modified, we need to recompress this file into the archive:
cd /mnt/esxi/
tar czf local.tgz etc
tar czf state.tgz local.tgz
rm -r local.tgz etc
The "tar" command's parameters let us archive "etc" into "local.tgz", and then archive "local.tgz" into "state.tgz" in order to recreate the original "state.tgz" archive with the "shadow" file we just modified.
Unmounting our ESXi's root partition
Don't forget to properly unmount your root partition:
cd /
umount /dev/sda5/
And reboot your system:
reboot
Changing the password on the vSphere client
Connect with your vSphere client to your ESXi 5.x with no "root" password, and change your password in the "local users and groups" menu as shown below:
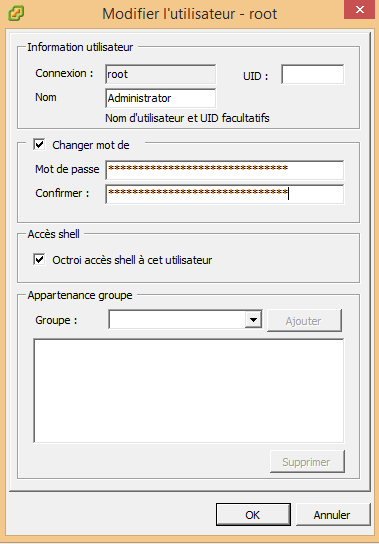
Congratulations, you've regained access to your ESXi 5.x.
Conclusion
This article detailed how to regain access to a VMware ESXi 5.x hypervisor after losing the root password, using an Ubuntu Live CD to mount the root partition, extract the system archives, and edit the shadow file containing the credentials. This method lets you regain full control of your server without losing the virtual machines already in place, as long as you properly remount and recompress the archives in order. It then remains essential to set a strong password via the vSphere client.