


Zimbra 8, a VMware solution optimized for vCloud. Install, administer, and manage your emails easily.
Real-world use case
You're looking for a collaborative email alternative optimized for VMware vCloud: here's how to install Zimbra 8 Open Source Edition.
Zimbra is a collaborative messaging solution acquired in 2010 by VMware.
It's a very reliable next-generation email and collaboration software.
Zimbra 8 is an answer for companies that want to have email in a vCloud.
The entire web interface is in "AJAX", which makes it very pleasant to use.
This article focuses on a basic installation of Zimbra 8.
The Zimbra modules we're going to install are the following:
- zimbra-ldap: Zimbra integrates a corporate directory feature and ldap configuration.
- zimbra-logger: Zimbra logger records the server's status information as well as its statistics.
- zimbra-mta: the MTA handles receiving and sending emails; it includes: postfix, clamav, SpamAssassin.
- zimbra-snmp: This module enables monitoring via snmp on the network.
- zimbra-store: This is where all your incoming/outgoing emails from all your mailboxes are stored.
- zimbra-apache: The Apache server displays the Zimbra interface on the web.
- zimbra-spell: Zimbra allows integrating a spell checker.
- zimbra-memcached: Better management of data and objects in RAM for more speed.
- zimbra-proxy: Allows having an intermediary between the server and the web, for example.
I deliberately selected everything in order to get an overview of Zimbra 8.
In practice, our Zimbra 8 is virtualized (vCloud) on an ESXi 5 infrastructure.
It's on a local network (lan); its configuration is called "single domain".
- Preparing our Linux server (Ubuntu 12.04 LTS).
- Installing the Zimbra 8 server.
- Configuring the Zimbra modules.
- The administrator web interface.
- Zimbra's important directories.
- The basic CLI commands.
Our server runs Ubuntu 12.04 LTS (a version supported by Zimbra).
Preparing the Linux server
Updating your source files and installing new packages:
apt-get update && apt-get upgrade
Go to the network interfaces configuration:
nano /etc/network/interface
Add your "eth0" interface (static configuration) to this file:
auto lo eth0

iface lo inet loopback

iface eth0 inet static
        address 192.168.10.10
        netmask 255.255.255.0
        broadcast 255.255.255.255
        gateway 192.168.10.1
Changing the FQDN machine name:
nano /etc/hostname
Add your domain name to this file, with a subdomain for example:
webmail.kassianoff.fr
Then, edit the server's "hosts" file:
nano /etc/hosts
Add the name resolution, the private IP address, and the FQDN name of your server to the file:
127.0.0.1       localhost.localdomain localhost
192.168.10.10   webmail.kassianoff.fr  webmail

# The following lines are desirable for IPv6 capable hosts
::1     ip6-localhost ip6-loopback
fe00::0 ip6-localnet
ff00::0 ip6-mcastprefix
ff02::1 ip6-allnodes
ff02::2 ip6-allrouters
ff02::3 ip6-allhosts
Editing resolv.conf:
nano /etc/resolv.conf
Write the following line:
nameserver 127.0.0.1
Zimbra is local; to avoid DNS resolution issues we need to use SPLIT-DNS.
Split DNS is the solution to the issues of using the same zone name internally and externally. Using the same domain name internally and externally causes resolution problems.
Split-DNS will be used with the dnsmasq software for its simplicity and efficiency.
Installing dnsmasq:
apt-get install dnsmasq
Go to the dnsmasq configuration file:
nano /etc/dnsmasq.conf
Write in the dnsmasq file:
server=213.186.33.99 (DNS)
server=188.165.54.37 (public IP)
domain=kassianoff.fr
mx-host=kassianoff.fr webmail.kassianoff.fr,5
listen-address=127.0.0.1
Checking the split-dns configuration:
dig webmail.kassianoff.fr
; <<>> DiG 9.3.6-P1 <<>> webmail.kassianoff.fr
;; global options: +cmd
;; Got answer:
;; ->>HEADER<<- opcode: QUERY, status: NOERROR, id: 39592
;; flags: qr aa rd ra; QUERY: 1, ANSWER: 1, AUTHORITY: 0, ADDITIONAL: 0

;; QUESTION SECTION:
;webmail.kassianoff.fr                   IN      A

;; ANSWER SECTION:
webmail.kassianoff.fr.            3564    IN      A       192.168.10.10

;; Query time: 2 msec
;; SERVER: 127.10.0.1#53(127.0.0.1)
;; WHEN: Sat Oct 26 18:17:18 2013
;; MSG SIZE  rcvd: 52
Your split-dns with dnsmasq is ready! Don't forget to restart the network and the hostname:
/etc/init.d/hostname restart && /etc/init.d/networking restart
Installing the Zimbra 8 server
We need to download the archive from the Zimbra site at this address.
wget http://files2.zimbra.com/downloads/8.0.5_GA/zcs-8.0.5_GA_5839.UBUNTU12_64.20130910124038.tgz
Extract the zcs-8.0.5 archive:
tar xvzf zcs-8.0.5_GA_5839.UBUNTU12_64.20130910124038.tgz
Go into the archive:
cd ./zcs-8.0.5_GA_5839.UBUNTU12_64.20130910124038
Run the Zimbra installation script:
./install.sh
Accept the program's installation license:
.Do you agree with the terms of the software license agreement?[N] Y
By default, the installation script checks for prerequisites for installing Zimbra:
Checking for prerequisites...

     FOUND: NPTL

     FOUND: netcat-openbsd-1.89-4ubuntu1

     FOUND: sudo-1.8.3p1-1ubuntu3.4

     FOUND: libidn11-1.23-2

     FOUND: libpcre3-8.12-4

     MISSING: libgmp3c2

     FOUND: libexpat1-2.0.1-7.2ubuntu1.1

     FOUND: libstdc++6-4.6.3-1ubuntu5

     MISSING: libperl5.14

Checking for suggested prerequisites...

     MISSING: pax does not appear to be installed.

     FOUND: perl-5.14.2

     MISSING: sysstat does not appear to be installed.

     MISSING: sqlite3 does not appear to be installed.

###WARNING###

The suggested version of one or more packages is not installed.

This could cause problems with the operation of Zimbra.

Do you wish to continue? [N] N

Exit? [N] Y
Exiting.
By default, the following packages are missing:
libgmp3c2, libperl5.14, pax, sysstat, sqlite3
Installing the missing packages:
apt-get install libgmp3c2 libperl-dev pax sysstat sqlite3
Then we restart the "install.sh" script installation:
 Checking for prerequisites...
     FOUND: NPTL
     FOUND: netcat-openbsd-1.89-4ubuntu1
     FOUND: sudo-1.8.3p1-1ubuntu3.4
     FOUND: libidn11-1.23-2
     FOUND: libpcre3-8.12-4
     FOUND: libgmp3c2-2:4.3.2+dfsg-2ubuntu1
     FOUND: libexpat1-2.0.1-7.2ubuntu1.1
     FOUND: libstdc++6-4.6.3-1ubuntu5
     FOUND: libperl5.14-5.14.2-6ubuntu2.3

Checking for suggested prerequisites...
     FOUND: pax
     FOUND: perl-5.14.2
     FOUND: sysstat
     FOUND: sqlite3
Prerequisite check complete.

Checking for installable packages

Found zimbra-core
Found zimbra-ldap
Found zimbra-logger
Found zimbra-mta
Found zimbra-snmp
Found zimbra-store
Found zimbra-apache
Found zimbra-spell
Found zimbra-memcached
Found zimbra-proxy

Select the packages to install

Install zimbra-ldap [Y]

Install zimbra-logger [Y] Y

Install zimbra-mta [Y] Y

Install zimbra-snmp [Y] y

Install zimbra-store [Y] Y

Install zimbra-apache [Y] Y

Install zimbra-spell [Y] Y

Install zimbra-memcached [N] Y

Install zimbra-proxy [N] Y
Checking required space for zimbra-core
Checking space for zimbra-store

Installing:
    zimbra-core
    zimbra-ldap
    zimbra-logger
    zimbra-mta
    zimbra-snmp
    zimbra-store
    zimbra-apache
    zimbra-spell
    zimbra-memcached
    zimbra-proxy

The system will be modified.  Continue? [N] Y
Careful, an error can occur at this stage of the installation (DNS error):
Operations logged to /tmp/zmsetup.10272013-111902.log
Installing LDAP configuration database...done.
Setting defaults...No results returned for A lookup of webmail.kassianoff.fr
Checked nameservers:
        127.0.0.1
No results returned for AAAA lookup of webmail.kassianoff.fr
Checked nameservers:
        127.0.0.1

DNS ERROR resolving webmail.kassianoff.fr
It is suggested that the hostname be resolvable via DNS
Change hostname [Yes] Yes
Please enter the logical hostname for this host [webmail.kassianoff.fr] kassianoff.fr
Check your DNS with the "dig" command seen earlier.
You restart the script and an MX error appears? Then you need to change the domain to "kassianoff.fr":
DNS ERROR resolving MX for webmail.kassianoff.fr

It is suggested that the domain name have an MX record configured in DNS

Change domain name? [Yes] Yes

Create domain: [webmail.kassianoff.fr] kassianoff.fr

        MX: webmail.kassianoff.fr (192.168.10.10)
        Interface: 192.168.10.10
        Interface: 127.0.0.1
        Interface: ::1
done.
Checking for port conflicts
Once this step is complete, the modules configuration menu appears.
Configuring Zimbra's modules in the CLI menu.
The main menu lets you configure all of Zimbra's modules.
We'll go over/change the choices chronologically from 1 to 8:
Main menu

1) Common Configuration:
   2) zimbra-ldap:                             Enabled
   3) zimbra-store:                            Enabled
        +Create Admin User:                    yes
        +Admin user to create:                 [email protected]
******* +Admin Password                        UNSET
        +Anti-virus quarantine user:           [email protected]
        +Enable automated spam training:       yes
        +Spam training user:                   [email protected]
        +Non-spam(Ham) training user:          [email protected]
        +SMTP host:                            webmail.kassianoff.fr
        +Web server HTTP port:                 80
        +Web server HTTPS port:                443
        +Web server mode:                      https
        +IMAP server port:                     7143
        +IMAP server SSL port:                 7993
        +POP server port:                      7110
        +POP server SSL port:                  7995
        +Use spell check server:               yes
        +Spell server URL:                     http://webmail.kassianoff.fr:7780/aspell.php
        +Enable version update checks:         TRUE
        +Enable version update notifications:  TRUE
        +Version update notification email:    [email protected]
        +Version update source email:          [email protected]

4) zimbra-mta:                              Enabled
   5) zimbra-snmp:                             Enabled
   6) zimbra-logger:                           Enabled
   7) zimbra-spell:                            Enabled
   8) zimbra-proxy:                            Enabled
   9) Default Class of Service Configuration:
   r) Start servers after configuration        yes
   s) Save config to file
   x) Expand menu
   q) Quit
Address unconfigured (**) items  (? - help)
Choose option number 1 for "common configuration"; the "Common configuration" menu appears:
Common configuration

 1) Hostname:                                webmail.kassianoff.fr
 2) Ldap master host:                        webmail.kassianoff.fr
 3) Ldap port:                               389
 4) Ldap Admin password:                     set
 5) Secure interprocess communications:      yes
 6) TimeZone:                                Africa/Algiers
 7) IP Mode:                                 ipv4
 8) Default SSL digest:                      sha1

Select, or 'r' for previous menu [r] 6
We'll simply change the Time Zone by selecting choice number 6:
"Europe/Paris" isn't available in the list so we'll use "Europe/Berlin":
78 Europe/Berlin
Then confirm your choice 78, then press "r" to return to the main menu.
Choose option number 2 for "zimbra-ldap"; the ldap configuration menu appears (optional):
Ldap configuration

   1) Status:                                  Enabled
   2) Create Domain:                           yes
   3) Domain to create:                        kassianoff.fr
   4) Ldap root password:                      set
   5) Ldap replication password:               set
   6) Ldap postfix password:                   set
   7) Ldap amavis password:                    set
   8) Ldap nginx password:                     set
   9) Ldap Bes Searcher password:              set

Select, or 'r' for previous menu [r]
This menu is used in particular for LDAP replication between several Zimbra servers.
By default, everything is configured so your server is the master and accepts LDAP replication.
Next, select option number 3 called "zimbra-store" in the main menu (mandatory):
Store configuration

   1) Status:                                  Enabled
   2) Create Admin User:                       yes
   3) Admin user to create:                    [email protected]
** 4) Admin Password                           UNSET
   5) Anti-virus quarantine user:              [email protected]
   6) Enable automated spam training:          yes
   7) Spam training user:                      [email protected]
   8) Non-spam(Ham) training user:             [email protected]
   9) SMTP host:                               webmail.kassianoff.fr
  10) Web server HTTP port:                    80
  11) Web server HTTPS port:                   443
  12) Web server mode:                         https
  13) IMAP server port:                        7143
  14) IMAP server SSL port:                    7993
  15) POP server port:                         7110
  16) POP server SSL port:                     7995
  17) Use spell check server:                  yes
  18) Spell server URL:                        http://webmail.kassianoff.fr:7780/aspell.php
  19) Enable version update checks:            TRUE
  20) Enable version update notifications:     TRUE
  21) Version update notification email:       [email protected]
  22) Version update source email:             [email protected]
The content of this submenu is fairly simple; you'll need to create an administrator password. You need to select choice number 4 and confirm your password, then go back with "r".
I recommend renaming the Users: virus*, spam, ham to make them more readable.*
Let's continue with choice number 4 of the main menu, "zimbra-mta" (optional):
Mta configuration

   1) Status:                                  Enabled
   2) MTA Auth host:                           webmail.kassianoff.fr
   3) Enable Spamassassin:                     yes
   4) Enable Clam AV:                          yes
   5) Enable OpenDKIM:                         yes
   6) Notification address for AV alerts:      [email protected]
   7) Bind password for postfix ldap user:     set
   8) Bind password for amavis ldap user:      set
This option allows relaying messages to another server, for example in the case of a multi-domain configuration; in our case, no changes are needed.
Choices number 5, 6, and 7 aren't of interest to us in this specific case (optional):
   5) zimbra-snmp:                             Enabled
   6) zimbra-logger:                           Enabled
   7) zimbra-spell:                            Enabled
Let's move on to choice number 8, "zimbra-proxy" (optional):
Proxy configuration

   1) Status:                                  Enabled
   2) Enable POP/IMAP Proxy:                   TRUE
   3) IMAP proxy port:                         143
   4) IMAP SSL proxy port:                     993
   5) POP proxy port:                          110
   6) POP SSL proxy port:                      995
   7) Bind password for nginx ldap user:       set
   8) Enable HTTP[S] Proxy:                    FALSE
We don't need zimbra-proxy, but if you want to have multiple domains on your server it's essential; you can change its status to "disabled" if you want.
Confirm the changes on the main menu like this:
 *** CONFIGURATION COMPLETE - press 'a' to apply
Select from menu, or press 'a' to apply config (? - help) a
Save configuration data to a file? [Yes] Yes
Save config in file: [/opt/zimbra/config.21039]
Saving config in /opt/zimbra/config.21039...done.
The system will be modified - continue? [No] Yes
Operations logged to /tmp/zmsetup.10272013-113242.log
Setting local config values...
At the end of the installation you should have:
Finished installing common zimlets.
Restarting mailboxd...done.
Creating galsync account for default domain...done.

You have the option of notifying Zimbra of your installation.
This helps us to track the uptake of the Zimbra Collaboration Server.
The only information that will be transmitted is:
        The VERSION of zcs installed (8.0.5_GA_5839_UBUNTU12_64)
        The ADMIN EMAIL ADDRESS created ([email protected])

Notify Zimbra of your installation? [Yes] Yes
Notifying Zimbra of installation via http://www.zimbra.com/cgi-bin/notify.cgi?VER=8.0.5_GA_5839_UBUNTU12_64&MAIL=[email protected]

Notification complete

Setting up zimbra crontab...done.

Moving /tmp/zmsetup.10272013-113242.log to /opt/zimbra/log

Configuration complete - press return to exit
The Zimbra server is ready! Don't forget to set up your NAT with the ports open to the outside:
22,25,143,443,587,993,7071
I recommend removing 22 and 7071 at the end of the configuration.
Getting started with the administrator web interface
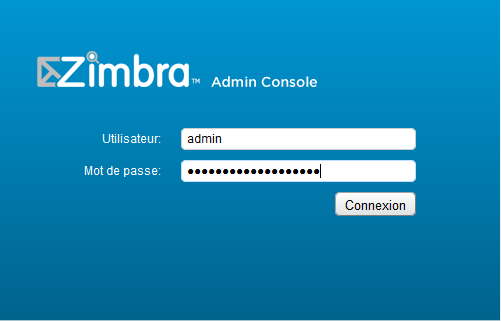
Go to your web interface in http or https on port 7071: https://webmail.kassianoff.fr
Nice, isn't it? Log in!
To add an account, click "add an account".
I won't cover the web interface options here; for more details: the zimbra interface.
Zimbra's important directories
Where are the Zimbra files located? They're all located in the following directory:
cd /opt/zimbra
You'll find all the installed modules there, along with their configuration and data.
The basic CLI commands
All commands are only run with the "zimbra" user.
Authenticate with the "zimbra" user:
su zimbra
Stop the Zimbra server:
zmcontrol stop
Start the Zimbra server:
zmcontrol start
Check the Zimbra server's status:
zmcontrol status
Displaying the Zimbra server's local configuration:
zmlocalconfig -s
Displaying the mysql root password:
zmlocalconfig -s mysql_root_password
Connect to mysql with the root account:
mysql -S /opt/zimbra/db/mysql.sock -u root --password=mysql_root_password
Displaying a user directory on the zimbra server:
mmailbox -z -m [email protected] gaf
Emptying a user's directory:
zmmailbox -z -m [email protected] ef /directoryName
Displaying the list of zimbra server users:
zmprov -l gaa
Creating a mail account:
zmprov ca [email protected] myPassword displayName myaccount
The list is still long, so for more information: the official documentation.
I encourage you to use an SSL certificate in order to have a valid certificate.
This article is coming to an end; I hope you like your zimbra server!