


Arch Linux, a Desktop distribution with no limits. An incredibly performant, minimalist system. You're the one who builds it entirely!
Table of contents
Real-world use case
You want a custom system with no limits imposed by the distribution: here's how to install Arch Linux.
Arch Linux is a great system, built under your own orders, which can also incidentally help you better protect your privacy.
You're going to build your own Linux system in order to fully master it. To learn more about Arch Linux, here's the description page available here.
Designing our Arch Linux:
- Preparing disk partitions and early settings for the installation.
- For your system to be functional, you'll need the base system packages.
- To boot the system, I rely on SYSLINUX, not GRUB.
- For your system to have a graphical interface, the XORG package needs to be present.
- To get a graphical environment: you'll select CINNAMON.
- For the connection manager (login/logout), the package installed will be: SLIM
- As for our window manager: NEMO (a fork of the famous NAUTILUS)
In practice, it'll look like this: a fast, lightweight, flexible, and good-looking distribution!
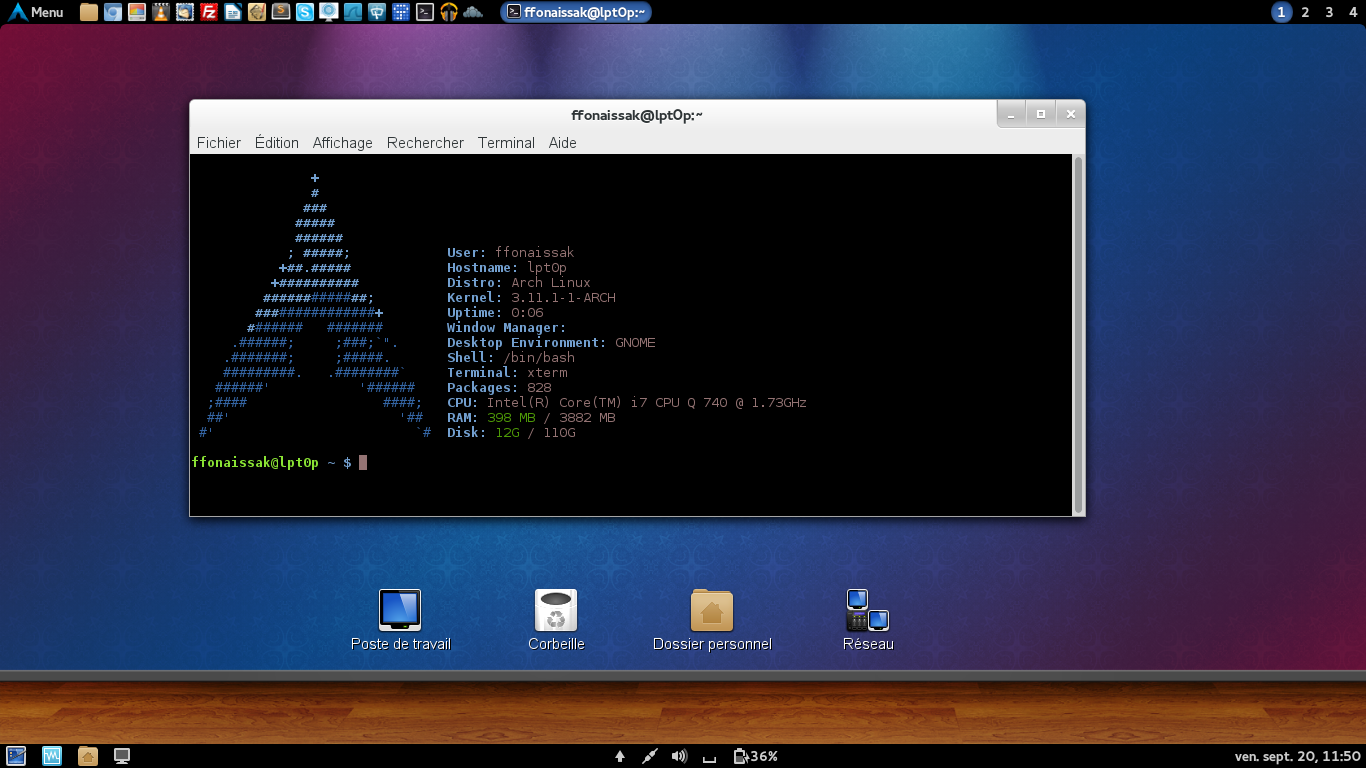
For the configuration steps, I followed Arch Linux's official wiki.
Don't hesitate to check out the forum or contact me.
The ISO image is available via torrents or direct download on Arch Linux's official website
Starting the installation:
After inserting your CD-Rom into your drive, you now need to choose:
– Boot Arch Linux (X86_64)
– Boot Arch Linux (i686)
Your choice won't affect the rest of the configuration.
Personally, I use the X86_64 version.
Please make sure your computer is physically connected via an ethernet port.
A few seconds later, you're on your live-cd:
Arch Linux 3.10.10-1-Arch (tty1)
archiso login : root (automatic login)
root@archiso ~ #
Feeling confused? The semi-graphical or graphical interface doesn't exist under Arch Linux!
I warned you, you're going to have to build your own operating system.
Changing the keyboard layout:
loadkeys fr-pc
Partitioning the disk with the cfdisk utility:
cfdisk
Here's the result of our partitioning:
cfdisk (util-linux-ng 2.14.2)
                            Disk drive: /dev/sda
                      Size: 128 849 018 880 bytes,  120 GB
             Heads: 255   Sectors per track: 63  Cylinders: 1876
    Name        Flags      Part Type  FS Type    [Label] Size (MB)
 ---------------------------------------------------------------------
    sda1        Boot        Primary   Linux ext3 / boot           100
    sda2                    Logical   Linux swap / Solaris        1000
    sda3                    Primary   Linux ext4 /                30000
    sda4                    Primary   Linux ext4 /home            115900
To learn how to use cfdisk, follow this link: openclassrooms cfdisk
Formatting the partitions:
mkfs.ext2 /dev/sda1
mkfs.ext4 /dev/sda3
mkfs.ext4 /dev/sda4
mkswap /dev/sda2
Mounting the partitions:
mkdir /mnt/{boot,home}
mount /dev/sda3 /mnt/
mount /dev/sda1 /mnt/boot
mount /dev/sda4 /mnt/home
swapon /dev/sda2
Installing the base system:
pacstrap /mnt/ base base-devel
Setting up the system's boot process:
pacstrap /mnt/ syslinux
Post-installation system configuration:
genfstab -U -p /mnt >> /mnt/etc/fstab
Chrooting into the new system:
arch-chroot /mnt
sh-4.2#
Setting the machine's hostname:
echo "lpt0p" > /etc/hostname
Add your language to the system:
echo "fr_FR.UTF-8 UTF-8" > /etc/locale.gen
locale-gen
==> Generating locales...
==>fr_FR.UTF-8...done
==> Generation complete.
Specify the keyboard layout:
echo "KEYMAP=fr-pc" > /etc/vconsole.conf
Choose the timezone (symlink):
ln -s /usr/share/zoneinfo/Europe/Paris /etc/localtime
Loading the ramdisk:
mkinitcpio -p linux
==> Image generation successful
Configuring the boot loader:
syslinux-install_update -iam
==> Syslinux install successfull
Setting a password for root:
passwd
==>Enter New UNIX password:
==>Retype New UNIX password:
==>passwd: password updated successfully
Network management with Network Manager
pacman -S networkmanager network-manager-applet
systemctl enable NetworkManager
Then exit the "chroot" with the command:
exit
Unmount everything
umount /mnt/boot /mnt/home /mnt
You can now reboot your computer.
reboot
Creating a user
useradd -g users -m -s /bin/bash ffonaissak
passwd ffonaissak
==>Enter New UNIX password:
==>Retype New UNIX password:
==>passwd: password updated successfully
Congratulations, your system is installed with a user and internet network access.
Now the configuration is going to get interesting, how about a graphical interface?
Implementing the XORG graphical system
pacman -Syu xorg-server xorg-xinit xorg-server-utils
pacman -S xf86-video-your_driver
Tip for installation on a VMware virtual machine:
pacman -S xf86-video-vmware open-vm-tools
Graphical environment with Cinnamon
pacman -Syu cinnamon cinnamon-control-center cinnamon-screensaver
nano /home/ffonaissak/.xinitrc
Add this inside the file:
exec cinnamon-session-cinnamon
Our NEMO window manager
pacman -S nemo
Our SLIM connection manager
pacman -S slim
systemctl enable slim.service
You can now reboot your computer.
reboot
After rebooting, everything becomes more graphical. But the XORG keyboard is in English.
We're going to configure it in French.
To go back to a terminal: CTRL+ ALT + F1
Authenticate as root:
nano /etc/X11/xorg.conf.d/10-keyboard-layout.conf
Section "InputClass"
    Identifier         "Keyboard Layout"
    MatchIsKeyboard    "yes"
    MatchDevicePath    "/dev/input/event*"
    Option             "XkbLayout"  "fr"
    Option             "XkbVariant" "latin9"
EndSection
You can now reboot your computer and start using your distribution.
However, to fully enjoy Arch Linux with a graphical interface, head over here.
Conclusion
I've detailed here the complete installation of Arch Linux, from the live-cd to a functional system with a network, a user, and a Cinnamon graphical interface. This step-by-step approach nicely illustrates Arch Linux's philosophy: nothing is preconfigured, and every component is chosen and assembled by the user. The resulting system remains lightweight and customizable, and serves as the base for the following article dedicated to further customization.