


Arch Linux ARM, a very lightweight Desktop distribution. An incredibly performant, minimalist system. You're the one who builds it entirely.
Table of contents
Real-world use case
You're looking for a very lightweight desktop distribution for your Raspberry Pi: discover Arch Linux ARM.
The Raspberry Pi is a small computer, notably able to decode full HD streams.
For more information, check out the official website.
The Arch Linux ARM distribution is available at this address: download Arch Linux ARM
In this article, the Arch Linux ARM system will be used for its incredible lightness.
In the end, it will only use 5% of the CPU and 26MB of RAM.
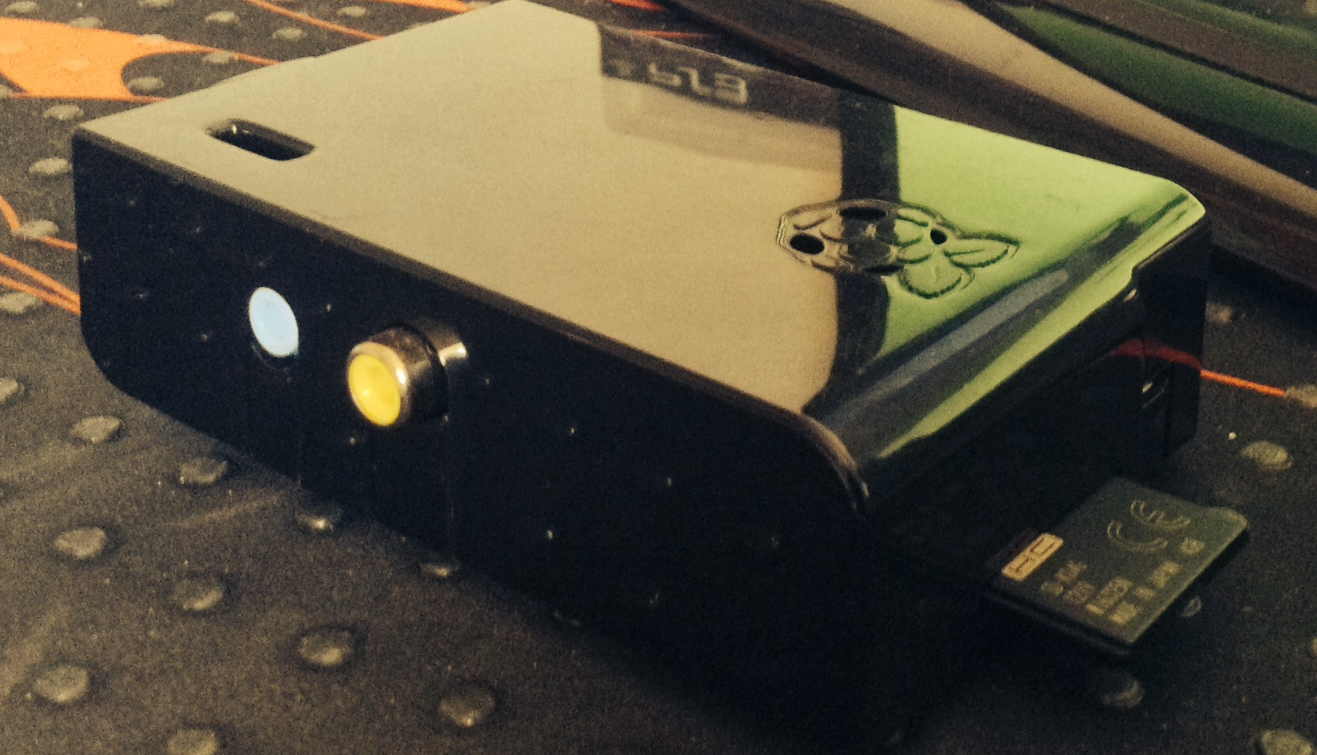
Here's my Raspberry Pi with a 4GB SD card:
Raspberry Pi configuration steps:
- Preparing the Raspberry Pi's memory card.
- Booting the system for the first time and system configuration.
- Resizing the Arch Linux root partition with fdisk.
- Updating the Arch Linux base with the Pacman manager.
- Installing AWESOME.
Preparing the memory card
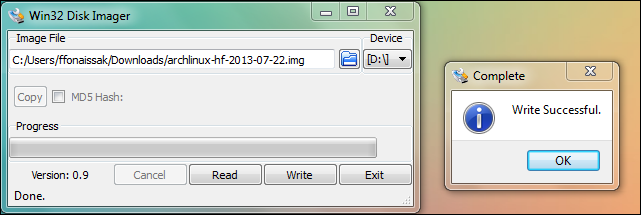
I used Windows 7 Pro X64 and the Win32 Disk Imager software available at this address.
Don't forget to run it as administrator.
Here's the result:
For formatting on Linux:
dd bs=1M if=~/Downloads/archlinux-hf-2013-07-22.img of=/dev/rdisk1
Booting the system:
Arch Linux 3.6.11-14-ARCH+ (tty1)
alarmpi login :
[root@alarmpi ~]# _
Configuring the system:
loadkeys fr-pc
echo "rapt0p" > /etc/hostname
Add your language to the system:
echo "fr_FR.UTF-8 UTF-8" > /etc/locale.gen
locale-gen
==> Generating locales...
==>fr_FR.UTF-8...done
==> Generation complete.
Specify the keyboard layout:
echo "KEYMAP=fr-pc" > /etc/vconsole.conf
Choose the timezone (symlink):
ln -s /usr/share/zoneinfo/Europe/Paris /etc/localtime
Add a user
useradd my_account -g users -m -s /bin/bash
Resizing the root partition:
Launching the fdisk utility:
fdisk -c -u /dev/mmcblk0

Welcome to fdisk (util-linux 2.23.2).
Changes will remain in memory only, until you decide to write them.
Be careful before using the write command.
Command (m for help):
To list partitions in fdisk:
p
We erase our extended partition:
d
5
=> Partition 5 is deleted
We erase partition 2:
d
2
=> Partition 2 is deleted
We need to recreate our extended partition:
n
e
2
=> First sector : Press Enter on your keyboard (leave default)
=> Last sector  : Press Enter on your keyboard (leave default)
We need to recreate our logical partition:
n
l
5
=> First sector : Press Enter on your keyboard (leave default)
=> Last sector  : Press Enter on your keyboard (leave default)
To finalize the changes on your SD card:
w
=> The parition table has been altered!
Rebooting the Raspberry Pi:
w
shutdown -r now
Let's resize the file system to match the logical partition's size:
resize2fs /dev/mmcblk0p5
=> Filesystem at /dev/mmcblk0p5 is mounted on /;
Checking our new partitions:
df -h

Filesystem      Size  Used Avail Use% Mounted on
/dev/root       3.5G  1.4G  2.0G   42% /
devtmpfs         83M     0   83M    0% /dev
tmpfs           232M     0  232M    0% /dev/shm
tmpfs           232M  240K  231M    1% /run
tmpfs           232M     0  232M    0% /sys/fs/cgroup
tmpfs           232M     0  232M    0% /tmp
/dev/mmcblk0p1   90M   24M   67M  27% /boot
Updating the system's base:
pacman -Syuu
During the download, an error message comes up?
=> error: failed retrieving file 'core.db' from mirror.archlinuxarm.org: connection time-out
To resolve this error:
yes|pacman -Scc
Installing XORG:
pacman -S xorg xorg-xinit xorg-server xorg-server-utils
Installing SLIM:
pacman -S slim
systemctl enable slim.service
Installing AWESOME:
pacman -S awesome
nano /home/my_account/.xinitrc
Add this inside the file:
exec awesome
Installing the Raspberry Pi's video driver:
pacman -S xf86-video-fbdev
Installing and configuring openssh:
pacman -S openssh
ssh-keygen -t dsa /etc/ssh/ssh_host_dsa_key
systemctl enable sshd.service
systemctl start sshd.service
You can now restart your Raspberry Pi.
reboot
After rebooting: the SSH server is active, as well as slim and awesome.
To get a static IP address, check out the official wiki.
We're going to configure it in French:
To go back to a terminal: CTRL+ ALT + F1
Authenticate as root.
nano /etc/X11/xorg.conf.d/10-keyboard-layout.conf
Section "InputClass"
    Identifier         "Keyboard Layout"
    MatchIsKeyboard    "yes"
    MatchDevicePath    "/dev/input/event*"
    Option             "XkbLayout"  "fr"
    Option             "XkbVariant" "latin9"
EndSection
You can now reboot your Raspberry Pi and start using your distribution.
I'll soon offer you an article on customizing Arch Linux ARM.
Conclusion
I've presented here the essential steps to install and configure Arch Linux ARM on a Raspberry Pi, from formatting the SD card to setting up a lightweight graphical environment with Awesome and SLIM. This minimalist distribution fully takes advantage of the Raspberry Pi's limited resources while keeping flexibility and performance. The result is a custom-built system, using very little CPU and memory, which serves as a good base for further customization.