


Discovering Juniper Network's SRX range. The SRX100, an affordable gateway for small businesses. First-boot configuration: "setup wizard" mode.

Real-world use case
You're discovering Juniper's SRX range: here's how to configure an SRX100 gateway via the J-Web interface.
Juniper Network's SRX series
Juniper Network's SRX range lets you manage security, routing, switching, and WAN connectivity. Configuring IPSec VPN access is also possible.
With an additional subscription, it can also manage so-called unified threat management (UTM): antivirus, application security, IPS, anti-spam, and enhanced web filtering (optional).
It's described as a services gateway for securing various corporate networks.
The device is very stable and powerful enough for small businesses (a dozen people or so).
To discover the SRX range, head over here: discover SRX.
Overview of the SRX100
The SRX100 services gateway offers, on the front panel (left to right):

- A Power button: shutdown and startup.
- Various LEDs: alarm, power, status, ha.
- A device reset button.
- A management console port.
- (8) 100Mb/s ports.
On the back of the device, you'll find the 12V power connector, the ground connector, and the security lock.
My model is specifically the SRX100H2, dated June 2014: purchased from IngramMicro.
For reference, in addition to the SRX100, the bundle includes:
- A quick start guide, the device's usage license, a hardware security guide.
- A DB9-to-RJ45 cable.
- A power cable in addition to the power adapter.
Pre-configuration: overview
To start using the device, we need to understand its default configuration and the key points needed for a properly working SRX100 setup.
By default, the device's settings are as follows: (photo of my Nexus 4).
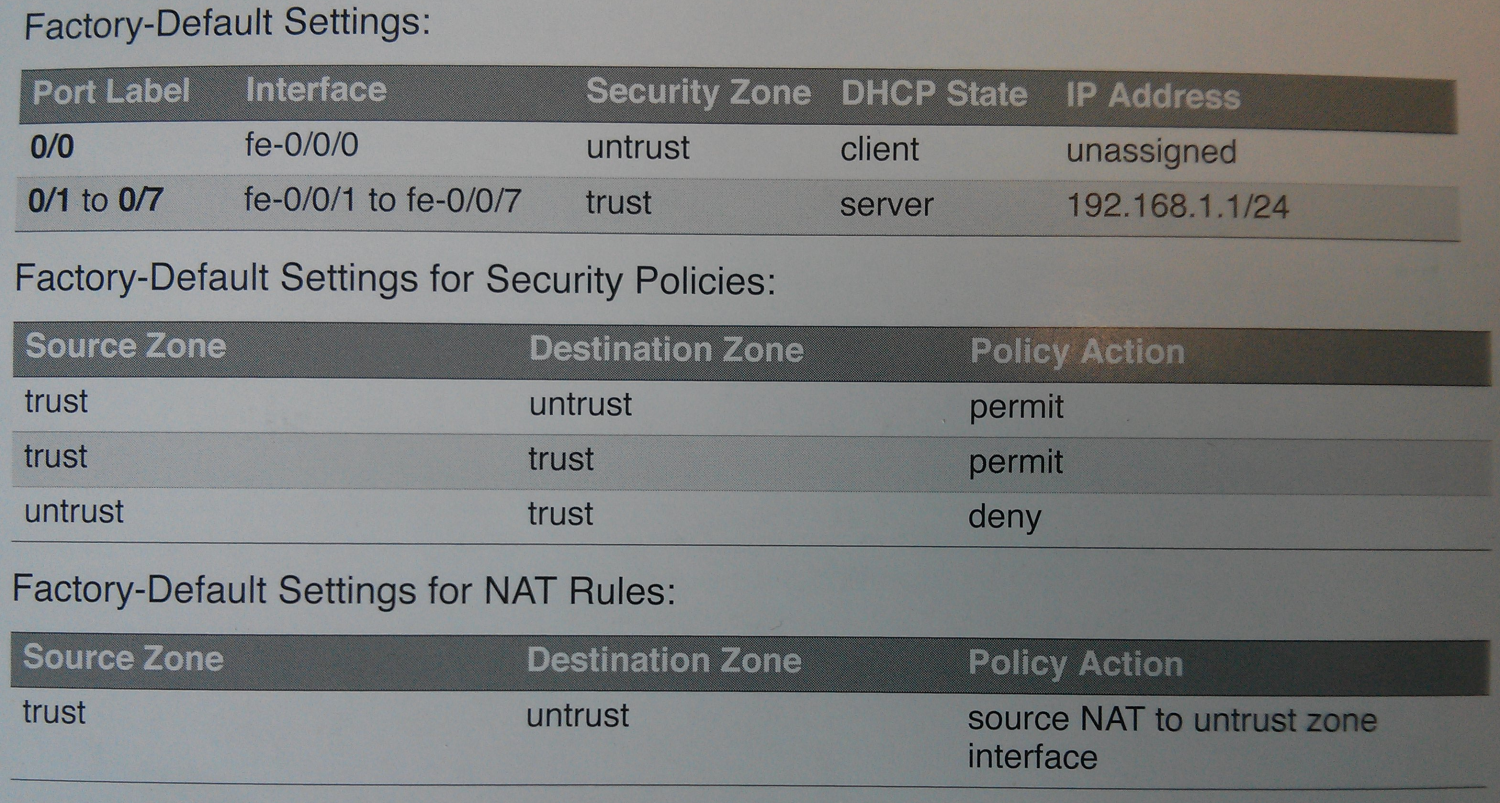
The documentation is very clear; we can see that ports 0/1 to 0/7 let you get an address to configure the SRX, and that there are two zones, untrust and trust, with policies.
A source NAT rule from "trust" to "untrust" is configured (allows access to the internet zone).
Now, we'll obviously modify the SRX configuration and adapt it to our needs.
Be aware that all of the following points will need to be configured:
- Interfaces will need to be configured with an IP address.
- Interfaces will be tied to a security zone.
- Zone policies will need to be configured between each other (allow or deny).
- Source NAT rules will need to be adjusted to access the internet.
Configuring the setup wizard in J-Web
We'll now discover the initial configuration of the SRX100 under J-Web.
J-Web is Juniper Network's web interface, here it is in "setup wizard" mode:
I won't show all 30 screenshots of the "setup" steps: I'll go through it briefly.
Basic settings
- Go to the IP address: http://192.168.1.1, and select step-by-step mode.
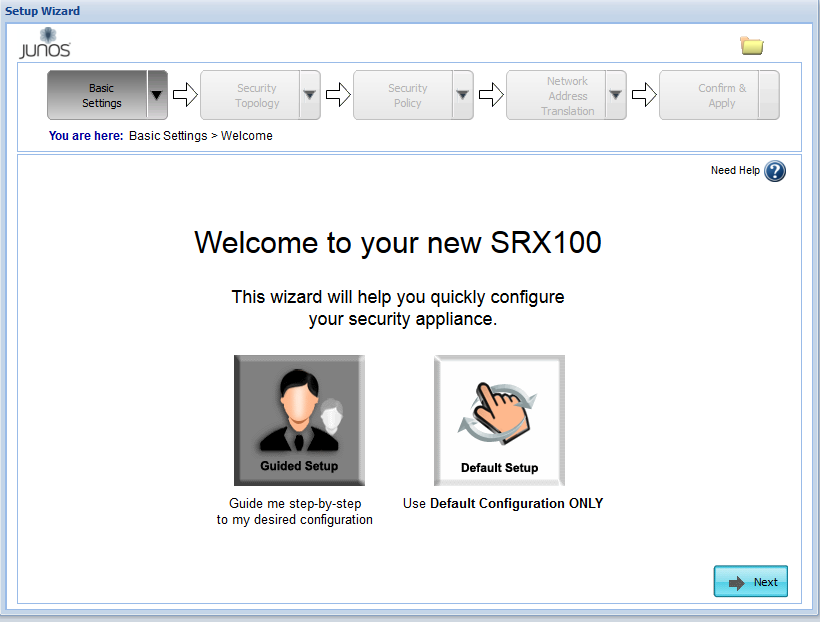
A progress bar appears at the top: "Basic Settings" => "Security Topology", etc…. these are the minimum configuration steps for the device to work properly.
- Next, choose between "basic options" or "advanced options".
I used the advanced option in order to explore the J-Web setup wizard interface as much as possible. - We're then asked to configure the "hostname", the "root account", as well as add a user (optional), I added mine with the "super user" role.
- The Time Zone and NTP configuration page appears next.
- A summary of the basic settings configuration is shown, which can be edited again if needed.
Security topology
In this section, we'll configure the internet zone, the DMZ, and the internal zone.
- Next, you're asked whether to connect the internet zone to our local (internal) network.
Personally, I connected the SRX to the internet, it sits in the DMZ zone of an Orange box. - Does internet access go through PPPoE on the SRX? Or DSL, or none? None, for me.
- Is the IP (WAN) address configuration dynamic or not? I use a static IP:
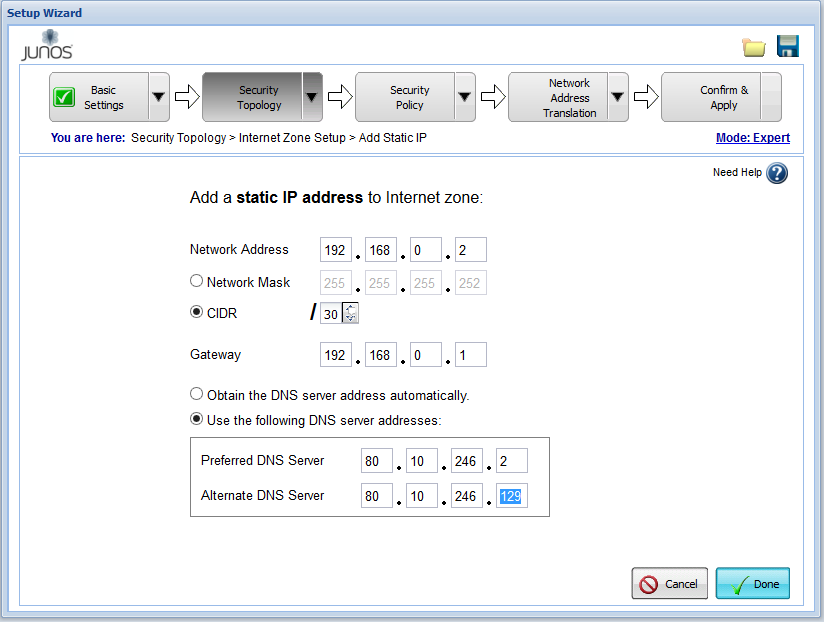
Remember, my SRX sits in a DMZ, so you'll notice Orange's DNS servers.
- For selecting the internet zone port, we go with the default template, port fe-0/0/0.
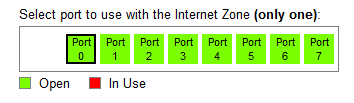
- Next comes the creation and configuration of the DMZ zone, "No/Yes"?
Personally, I don't need my SRX to create a DMZ zone. - We now move on to representing our internal network by selecting our diagram.
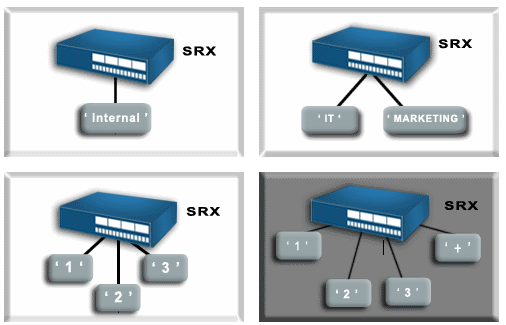
- Zone configuration appears; one zone per service can be created, here's an example:
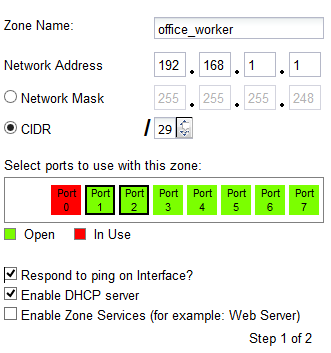
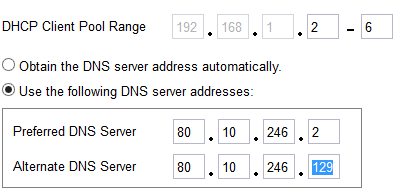
- The next step is to configure our DHCP range for office employees:
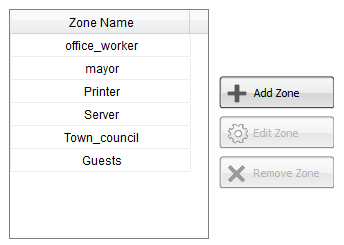
A quick summary of the different zones created:
Security policy
The third step involves adding one or more UTM licenses (optional), defining access between our different zones, configuring the management interface, and remote access VPN.
Activating purchased licenses can be done manually or downloaded directly via a code.
In my case, I don't have a UTM license, so I just leave the defaults and continue.
Now let's move on to configuring traffic between our different zones:
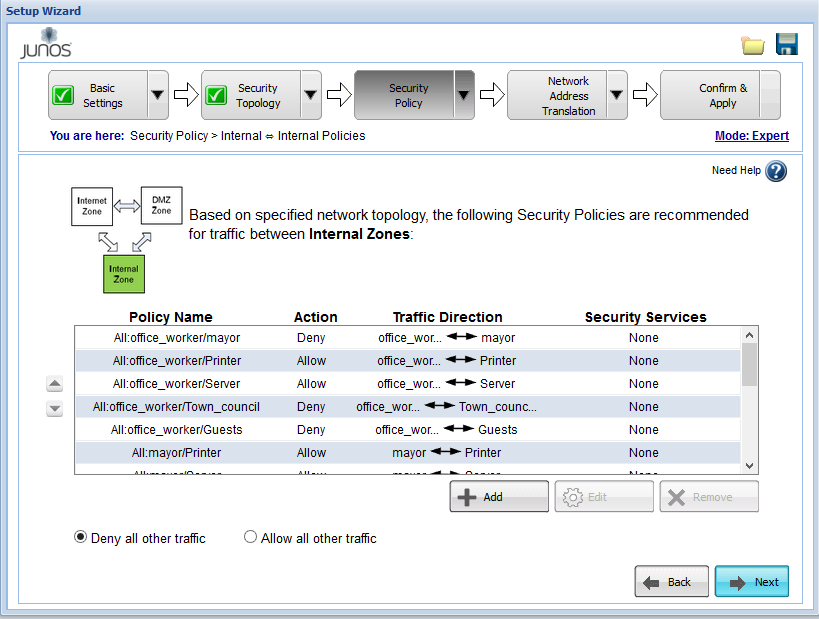
For example, in the image above, we find the policy "office_worker"/mayor in action deny*, since the employees' zone shouldn't be able to communicate with the mayor.*
- You can choose whether zones are allowed to access the SRX's management.
The access protocols are: http/ssh/nsm/https/telnet, I chose a single zone: mayor. - The SRX asks whether a remote worker coming from the internet zone will be allowed to connect.
As an example, I answered yes, here's the creation of my user "ffonaissak."
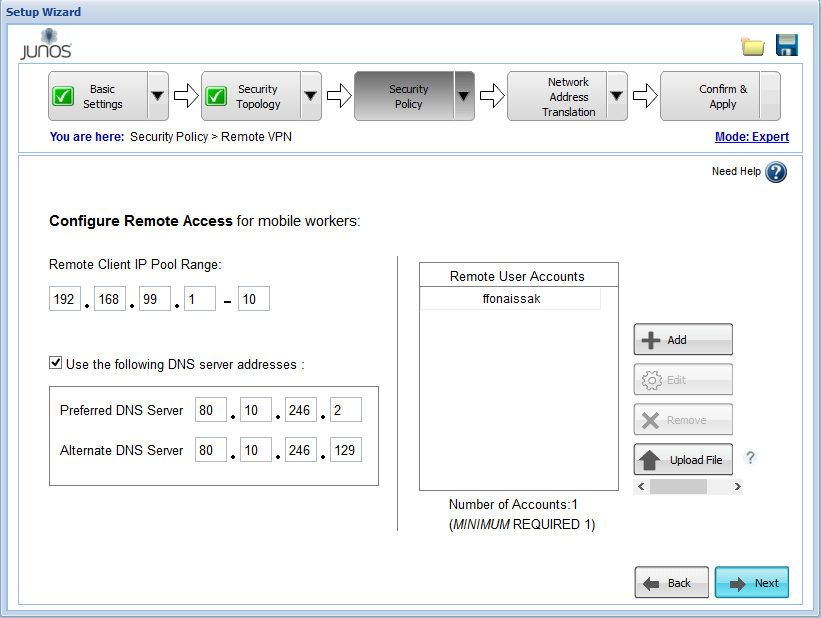
- The rest of the remote user's configuration involves granting them access to available zones.
I allowed the server and printer zones, they'll be able to access the server and print, which is practical!
Source/destination NAT
Granting our different zones internet access is done through source NAT, while destination NAT enables communication from the internet into our private network.
- Which zones will have access to the internet zone?
I checked all zones, even printer*, since it also faxes.* - Next comes the option to set up destination NAT.
I didn't configure destination NAT.
Configuring the SRX100 under the J-Web setup wizard is now complete.
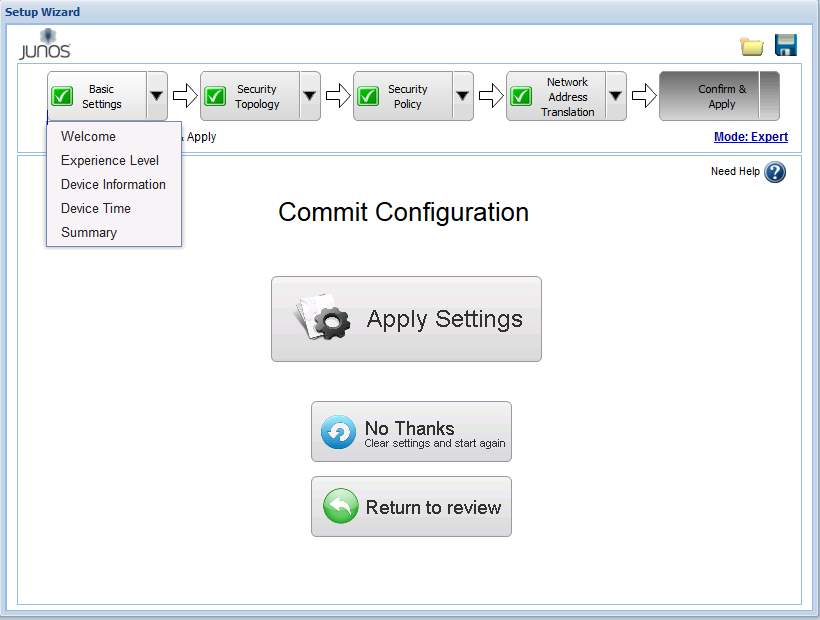
Access to the configuration interface under J-Web is now possible in the mayor's zone (https).
I now encourage you to explore the https management interface of the SRX 100 under J-Web.
Note that it's important to update the SRX via the software download page.
Conclusion
This walkthrough of the SRX100 via the J-Web "setup wizard" covers the basic settings, security topology (internet/DMZ/internal zones), inter-zone policies, as well as source and destination NAT. The graphical interface makes accessible a configuration that would remain more complex via CLI, while still being well suited to the needs of a small business. This gateway provides a good entry point before getting familiar with the more complete CLI configuration of the SRX range.