

Keeping control of all your high-tech devices at home is becoming increasingly difficult, especially with the growing number of connected devices.
Real-world use case
You want to take back control of your connected devices at home: here's how I structured my home infrastructure.
Choosing a home infrastructure
Over time, more and more high-tech equipment is making its way into our homes. Managing and interconnecting it all can raise a few challenges. Several approaches are possible; for my part, I opted for a centralized home infrastructure split into several pools. We'll cover the needs and constraints that led me to set up my own equipment rack.
Becoming the master of your equipment
- Overview of my needs
- Real-world scenario
- How my infrastructure works
- Conclusion of this write-up
Overview of my needs
My infrastructure has to meet several constraints. Indeed, I currently live in a recently built apartment (built in June 2014) with a floor area of 39m². However, much to my surprise, I have no RJ45 network cabling. I chose not to use Wi-Fi, so I had to centralize all my equipment in one single location. To better understand how I use my devices, I categorized them as follows:
- Multimedia equipment: smart TV, Wi-Fi Chromecast, PS3.
- Home automation equipment: connected lighting, robots (e.g., vacuum cleaner).
- Production equipment: desktop computer.
- Sensitive equipment: router, switch, Raspberry Pi, server.
Every day, I use my equipment for four quite different purposes. For me, isolating all this equipment lets me limit its communication scope while also controlling it better. My home infrastructure choice aims to be organized, secure, and functional.
Real-world scenario
Within my own apartment, I chose to buy an equipment rack to centralize all my sensitive equipment and interconnect the other equipment pools over RJ45. Everything had to be quiet so as not to be a nuisance day to day. To do this, my budget constraint was €1000 for this project, and here are the components I selected:
- A network rack: 19″ Cablematic – RackMatic SOHORack 18U, 550mm, wall-mounted swing frame. (~€137).
- A router: 8-port Ubiquiti EdgeRouter 8 10/100/1000 (~€400 with fan replacement).
- A switch: 24-port Cisco SG300-24 10/100/1000 (~€300).
- RJ45 cables: LogiLink EconLine AWG26 Cat6 F/UTP. (~€30).
- M6x2 cage nuts (~€17).
- A 2U front panel from Cablematic (~€30).
- A 1U cable management panel NGC (€13).
- A Raspberry Pi Model B (€40, purchased in 2013, not counted in the total).
- A small Intel D410PT server (€231, purchased in 2011, not counted in the total).

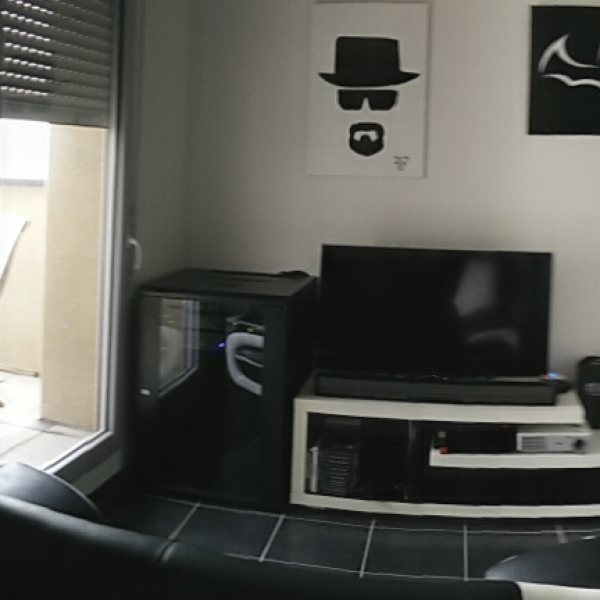
Here's how my apartment is currently laid out following the purchase of all this equipment:
//static.exagon.me/tn_img/c/11/infrastructure.domestique.salon.png
https://kassianoff.fr/wp-content/uploads/2022/12/photo\_infrastructure.domestique.baie\_.png

To summarize my whole infrastructure, it's important to understand that I replace my ISP's box with two separate elements: a router, then a switch. From there, devices only communicate through the SG-300 switch, across various VLANs and security zones. As for the gateway that lets them reach the internet through the router, it plays several roles, notably around security.
How my infrastructure works
I configured my router as well as my switch. It's necessary to make choices about network addressing as well as the security to apply to my environment. Let's take a simple example: my Smart TV, a Samsung UE40H6400. Features like Samsung's Smart Hub and the TV's voice assistant give me a range of new functionality I don't necessarily need. I don't want the manufacturer to make use of my voice data or various viewing history from my TV usage.
The goal here is to very tightly restrict the network communication of devices toward the outside. In addition, each pool has its own VLAN, isolated from the rest, within a security zone with logging of every event. These logs are sent to my server (D410PT). To do this, here are the steps I needed to take to gain at least a minimal level of control over my home infrastructure:
- Setting up bridge mode on my Freebox Revolution.
- Configuring my Ubiquiti router: VLANs, DHCP, firewall with policies, proxy server.
- Configuring my Cisco L3 switch: tagged VLANs, port security.
- Configuring my logging and IDS server.
The interconnection diagram looks something like this: (the colors represent a zone within a VLAN)
https://kassianoff.fr/wp-content/uploads/2022/12/schema\_infrastructure.domestique.png

Additional information: my desktop computer and my sensitive equipment communicate only via SSH using public/private key authentication. For organizational reasons, I only allow my Linux system to communicate with the infrastructure's equipment, and when I boot into Windows from my desktop computer, my switch recognizes the network card and my IP shifts to the multimedia VLAN port (we'll come back to this in my labs).
Conclusion of this write-up
The goal of this write-up was to present my needs and my project without going into the details of the configuration. I hope my home rack gave you some ideas for building your own. I can now say that my home infrastructure fits my thoroughly connected personality. I control the flow of information on my network. I have better control over all my pools, proof that even within a small apartment, it's possible to have fun making certain technical and technological choices.