

Want to rename an entire VM? There are simple, effective solutions! Requirement: an ESXi host with SSH access enabled.
Real-world use case
You need to rename an ESXi VM end to end, files included: here's how to properly edit the vmx, vmxf, vmdk, and nvram files.
The goal of this article is to understand how to rename an entire VM in ESXi.
A virtual machine uses a path and configuration files stored in a datastore.
There are 4 files that let the virtual machine start:
- a .vmx file that contains all the configuration data, including absolute paths, etc…
- a .vmxf file, which is an additional configuration file.
- a .vmdk file, which corresponds to the content of the virtual machine's hard drive.
- a .nvram file, which represents the virtual machine's BIOS.
Backing up the machine to rename
Before doing anything with the virtual machine, it must be powered off and have no snapshots.
You can make a clone of the ".vmdk" to have a fallback, using the "vmkfstools" tool:
vmkfstools -i vm_prod.vmdk vm_prod_save.vmdk -d thin
Don't forget to move the clone to a different folder:
mv vm_prod_save.vmdk ../vm_prod_save/
And to copy the important side files into that directory:
cp vm_prod.vmx vm_prod.vmxf vm_prod.nvram ../vm_prod_save/
Once these steps are done, go ahead and start working on the VM.
Renaming the virtual machine's folder
My machine is stored in datastore1:
cd /vmfs/volumes/datastore1/
Rename the "vm_prod" folder to "prod":
mv vm_prod/ prod
Move into the "prod" folder:
cd prod/
List all the available files:
ls
The following output appears:
vm_prod-flat.vmdk vm_prod.nvram vm_prod.vmdk vm_prod.vmsd vm_prod.vmx vm_prod.vmxf vmware.log
Edit the "vm_prod.vmx" file:
vi vm_prod.vmx
Press the "i" key (insert mode) to edit the file as follows:
nvram = "prod.nvram"
extendedConfigFile = "prod.vmxf"
scsi0:0.fileName = "prod.vmdk"
sched.swap.derivedName = "/vmfs/volumes/"YOUR_DATASTORE_NUMBER_HERE"/prod/prod-e6f7a239.vswp"
Once you've checked the changes, press the "esc" key on your keyboard.
To save the changes, type "
Rename the "vm_prod.vmx" and "vm_prod.vmxf" files:
mv vm_prod.vmx prod.vmx
mv vm_prod.vmxf prod.vmxf
You can also do this for "vm_prod.nvram" and the ".vswp" file, but it's not required!
Starting the virtual machine after the change
I recommend removing the old "vm_prod" machine from your inventory.
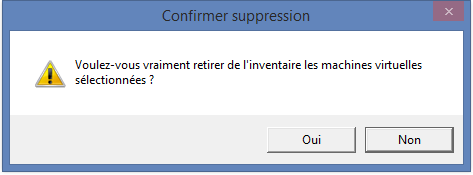
With the vSphere client, go to your datastore1 and add "prod.vmx" to the ESXi inventory.
A message appears when starting the virtual machine, click "I copied it":
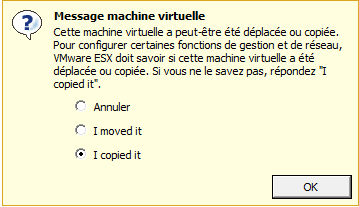
You have officially renamed your entire virtual machine in VMware ESXi.
Conclusion
This article explained how to properly rename a virtual machine in VMware ESXi by working on its .vmx, .vmxf, .vmdk, and .nvram files: first backing up the disk and side files, renaming the folder and files, then updating the paths in the .vmx file before re-adding the VM to the inventory. This method avoids having to recreate the virtual machine from scratch and lets you keep its original disk and configuration. However, it's essential to power off the VM and remove its snapshots before making any changes.