


Want to migrate to KVM with WebVirtMgr? Then discover: kvm, libvirt, webvirtmgr, brctl and many others! Prerequisite: a KVM-compatible server.
Table of contents
Real-world use case
You want to manage your migration to KVM from a web interface rather than the command line: here's how to proceed with WebVirtMgr.
A migration geared toward open source
To ensure the longevity and stability of my infrastructure, I chose KVM: an open, interoperable standard with immense features. More specifically, this new project fits into my desire to stay as close as possible to my Linux system. KVM is present in the largest cloud computing projects: OpenStack, OpenNebula, oVirt, and many others.
In addition to KVM, there's also this fabulous container system called Docker, which itself is entirely based on Linux. Both represent wonderful learning opportunities for understanding the cloud. KVM management will largely be done with an HTML5 interface. For Docker, there's Shipyard, which I won't cover in this article.
My entire article is based mainly on the KVM wiki, the WebVirtMgr wiki, and libvirt.
The SaaS solution: WebVirtMgr
WebVirtMgr presents itself as a web interface built with Bootstrap. It uses the libvirt API to manage the hypervisor(s), networks, interfaces, storage, and VMs. Access to the VM is done via a VNC console (novnc) or HTML5 "spice".
More information at: webvirtmgr.
Here's an illustration of my infrastructure:
WebVirtMgr and the KVM/QEMU hypervisor
KVM (Kernel Virtual Machine) is a Linux kernel module that lets a userspace program use the hardware virtualization features of various processors. Today, it supports recent Intel processors and AMD processors (x86 and x86_64), PPC 440, PPC 970, S/390, ARM (Cortex A15), and MIPS32 (processor emulation).
QEMU can make use of KVM when running a target architecture that's the same as the host architecture. For example, when running qemu-system-x86 on an x86-compatible processor, you can take advantage of KVM acceleration, benefiting both your host and your guest system (virtual machine emulation).
Source: http://wiki.qemu.org/KVM
Prerequisites before installation
- The processor must be compatible with virtualization technologies:
egrep '^flags.*(vmx|svm)' /proc/cpuinfo
If a result appears, then your processor is capable. Otherwise, your processor doesn't support virtualization.
No worries! There's webvirtmgr with lxc and of course Docker: check it out!
- Install the following packages:
apt-get install kvm libvirt-bin bridge-utils sasl2-bin
- Download retspen's script and run it:
wget http://retspen.github.io/libvirt-bootstrap.sh
sh libvirt-bootstrap.sh
For your information, at the end of the script you should have the following services running:
- ok Starting system message bus: dbus.
- ok Starting libvirt management daemon: libvirtd.
Installing WebVirtMgr
WebVirtMgr needs the following packages to work:
apt-get install git python-pip python-libvirt python-libxml2 novnc supervisor
During the (long) installation, several questions will appear:
should a database be installed for NOVA: yes
should nova-common's database be configured with dbconfig-common: yes
type of database server to use with nova-common! sqlite3
The next step consists of configuring Python and the "django" environment:
mkdir /var/www
Move into the www directory:
cd /var/www
Download the WebVirtMgr git repo:
git clone git://github.com/retspen/webvirtmgr.git
Go to the following directory:
cd webvirtmgr
The pip tool is used because it will quickly install and automatically download the required dependencies:
sudo pip install -r requirements.txt

Downloading/unpacking django==1.5.5 (from -r requirements.txt (line 1))
  Downloading Django-1.5.5.tar.gz (8.1MB): 8.1MB downloaded
  Running setup.py (path:/tmp/pip_build_root/django/setup.py) egg_info for package django

    warning: no previously-included files matching '__pycache__' found under directory '*'
    warning: no previously-included files matching '*.py[co]' found under directory '*'
Downloading/unpacking gunicorn==18.0 (from -r requirements.txt (line 2))
  Downloading gunicorn-18.0.tar.gz (366kB): 366kB downloaded
  Running setup.py (path:/tmp/pip_build_root/gunicorn/setup.py) egg_info for package gunicorn

    warning: no previously-included files matching '*.pyc' found under directory 'docs'
    warning: no previously-included files matching '*.pyo' found under directory 'docs'
    warning: no previously-included files matching '*.pyc' found under directory 'tests'
    warning: no previously-included files matching '*.pyo' found under directory 'tests'
    warning: no previously-included files matching '*.pyc' found under directory 'examples'
    warning: no previously-included files matching '*.pyo' found under directory 'examples'
Downloading/unpacking lockfile>=0.9 (from -r requirements.txt (line 5))
  Downloading lockfile-0.10.2-py2-none-any.whl
Installing collected packages: django, gunicorn, lockfile
  Running setup.py install for django
    changing mode of build/scripts-2.7/django-admin.py from 644 to 755

    warning: no previously-included files matching '__pycache__' found under directory '*'
    warning: no previously-included files matching '*.py[co]' found under directory '*'
    changing mode of /usr/local/bin/django-admin.py to 755
  Running setup.py install for gunicorn

    warning: no previously-included files matching '*.pyc' found under directory 'docs'
    warning: no previously-included files matching '*.pyo' found under directory 'docs'
    warning: no previously-included files matching '*.pyc' found under directory 'tests'
    warning: no previously-included files matching '*.pyo' found under directory 'tests'
    warning: no previously-included files matching '*.pyc' found under directory 'examples'
    warning: no previously-included files matching '*.pyo' found under directory 'examples'
    Installing gunicorn_paster script to /usr/local/bin
    Installing gunicorn script to /usr/local/bin
    Installing gunicorn_django script to /usr/local/bin
  Found existing installation: lockfile 0.8
    Uninstalling lockfile:
      Successfully uninstalled lockfile
Successfully installed django gunicorn lockfile
Cleaning up...
Start creating the database via django:
./manage.py syncdb
WARNING:root:No local_settings file found.
Creating tables ...
Creating table auth_permission
Creating table auth_group_permissions
Creating table auth_group
Creating table auth_user_groups
Creating table auth_user_user_permissions
Creating table auth_user
Creating table django_content_type
Creating table django_session
Creating table django_site
Creating table servers_compute
Creating table instance_instance
Creating table create_flavor

You just installed Django's auth system, which means you don't have any superusers defined.
Would you like to create one now? (yes/no): yes
Please enter either "yes" or "no": yes
Please enter either "yes" or "no": yes
Username (leave blank to use 'root'): kassianoff
Email address: [email protected]
Password:
Password (again):
Superuser created successfully.
Installing custom SQL ...
Installing indexes ...
Installed 6 object(s) from 1 fixture(s)
We start again, this time with collectstatic:
./manage.py collectstatic

Type 'yes' to continue, or 'no' to cancel: yes
75 static files copied
Give the web server rights to the WebVirtMgr directory:
chown -R www-data:www-data /var/www/webvirtmgr/
Modifying the script and the VNC startup:
sudo service novnc stop
[ ok ] Stopping OpenStack NoVNC proxy: nova-novncproxy.
Removing the startup script for our Debian distribution:
update-rc.d -f novnc remove
update-rc.d: using dependency based boot sequencing
Removing the script in init.d:
rm /etc/init.d/novnc
Fill in the startup settings in the webvirtmgr.conf file:
nano /etc/supervisor/conf.d/webvirtmgr.conf
[program:webvirtmgr]
command=/usr/bin/python /var/www/webvirtmgr/manage.py run_gunicorn -c /var/www/webvirtmgr/conf/gunicorn.conf.py
directory=/var/www/webvirtmgr
autostart=true
autorestart=true
stdout_logfile=/var/log/supervisor/webvirtmgr.log
redirect_stderr=true
user=www-data
program:webvirtmgr-console
command=/usr/bin/python /var/www/webvirtmgr/console/webvirtmgr-console directory=/var/www/webvirtmgr autostart=true autorestart=true stdout_logfile=/var/log/supervisor/webvirtmgr-console.log redirect_stderr=true user=www-data
We stop the supervisor service and start it:
service supervisor stop
service supervisor start
The installation is complete, and we can now access the WebVirtMgr interface via port 8000 of our machine.
SSH tunneling under Linux
The SSH tunneling method allows forwarding ports 8000 and 6080 (novnc) to our (secured) client machine:
ssh [email protected]:port -L localhost:8000:localhost:8000 -L localhost:6080:localhost:6080
Go to the url: localhost:8000 and enter your login credentials configured during ./manage.py syncdb:

Connection between WebVirtMgr and KVM/QEMU
Several steps will be needed before we can configure the infrastructure.
- Create your TCP connection credentials like this:
saslpasswd2 -a libvirt kassianoff.fr
Password:
Again (for verification):
- Declare your hypervisor in virsh:
virsh -c qemu+tcp://localhost/system nodeinfo
Please enter your authentication name: kassianoff.fr
Please enter your password:
CPU model:           x86_64
CPU(s):              8
CPU frequency:       1632 MHz
CPU socket(s):       1
Core(s) per socket:  4
Thread(s) per core:  2
NUMA cell(s):        1
Memory size:         32917020 KiB
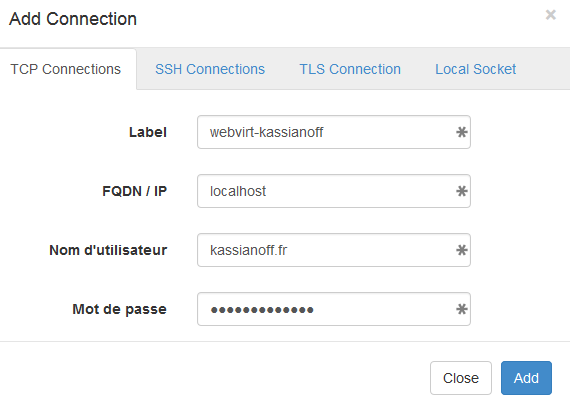
Now let's add our TCP connection by clicking the "Add connection" button
Here's the result:
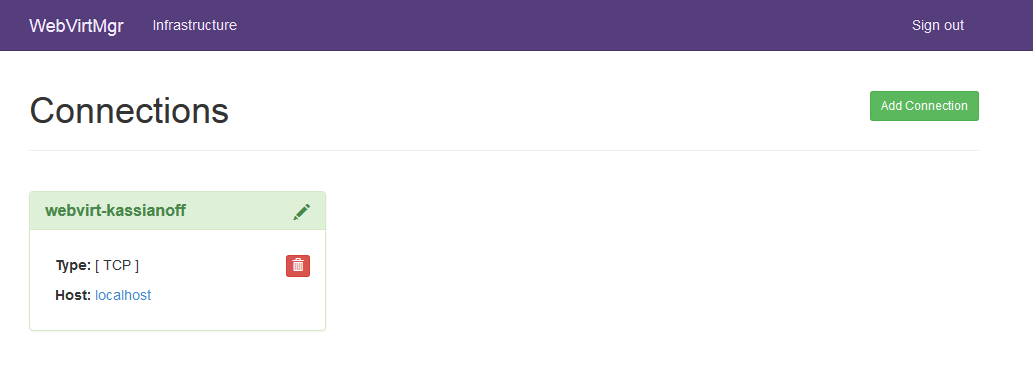
Getting started with WebVirtMgr
I think it's important to understand the different sections that make up WebVirtMgr:
- Instances: Managing and creating virtual machines; these are our instances.
- Storages: Managing and creating the different storage pools (directory, iso, nfs, lvm...).
- Networks: Managing and creating networks (bridge, route, nat...).
- Interfaces: Managing and creating the various interfaces that networks can use.
- Secrets: I didn't get any information about it; if a visitor has information, I'm interested!
- Overview: Monitor our entire infrastructure: resources used (cpu, memory, etc...).
I used all the sections (except Secrets); start by following the steps below to be able to create an instance.
Creating storage pools
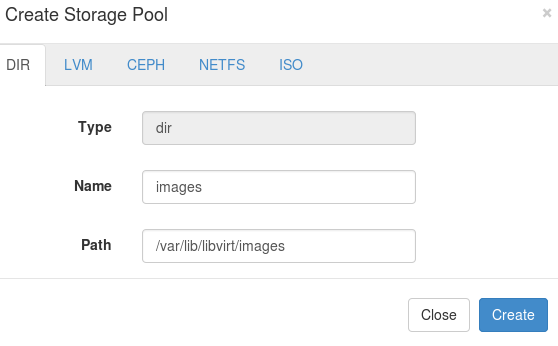
Before starting to create a machine, we'll need storage pools; click on Storages then on New storages, the configuration is as follows:
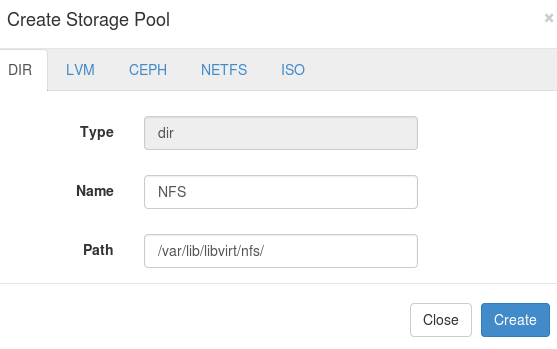
Creating a DIR directory with the path /var/lib/libvirt/images.
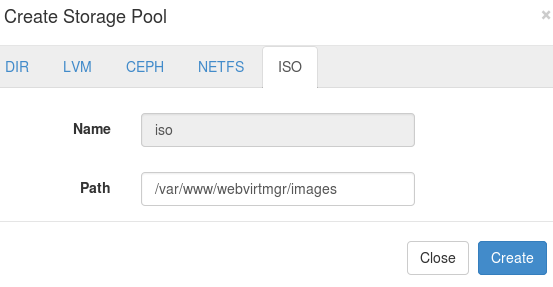
Creating the ISO directory with the path /var/www/webvirtmgr/images:
On an OVH dedicated server, use NFS-common, and create an nfs directory to connect it to the NFS backup storage
apt-get install nfs-common
mkdir /var/lib/libvirt/nfs/
mount -t nfs ftpback-rbxX-XXX.ovh.net:/export/ftpbackup/nsXXXXXXX.ovh.net /var/lib/libvirt/nfs/
When creating the pool, there's a NETFS mode compatible with NFS, however the format isn't taken into account.
The solution is to use the dir mode by specifying the previously mounted nfs directory:
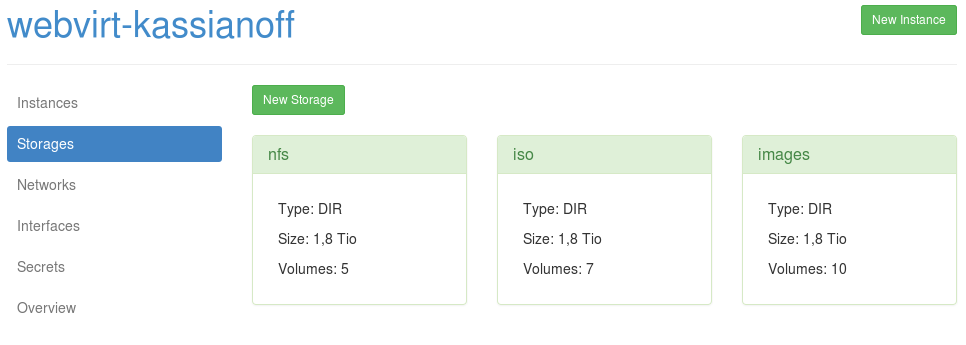
Check your different storage pools: nfs, iso, images:
I won't cover creating a machine in the images menu, nor adding an ISO file via WebVirtMgr.
The reason is simple: I use the terminal for those tasks. Let's focus on the networks before creating our VM.
The networks section in WebVirtMgr
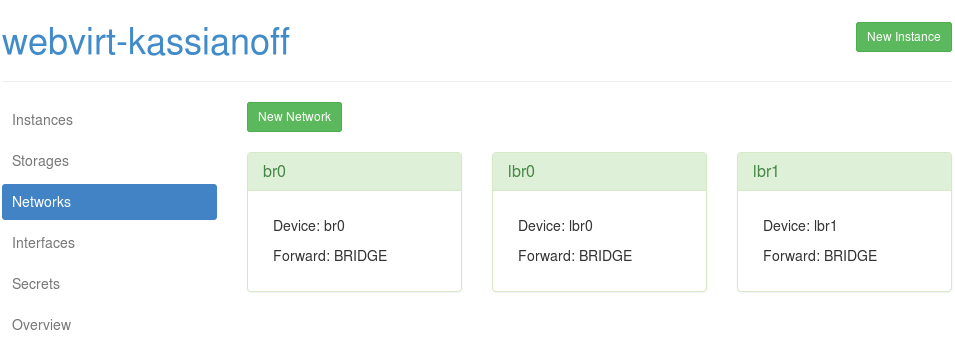
Networks are added via the networks tab. Add two bridge networks lbr0 and lbr1:
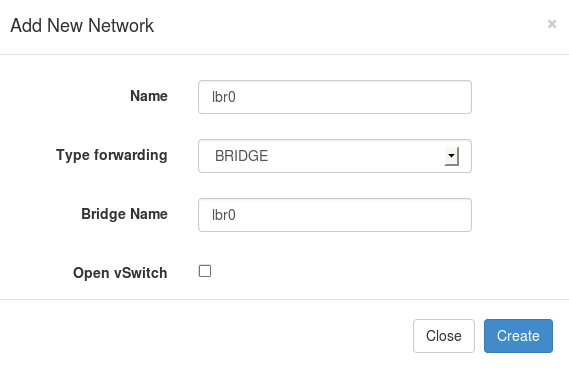
Repeat the operation above to create the second bridge interface, which will give:
Interfaces and bridged networks under Linux
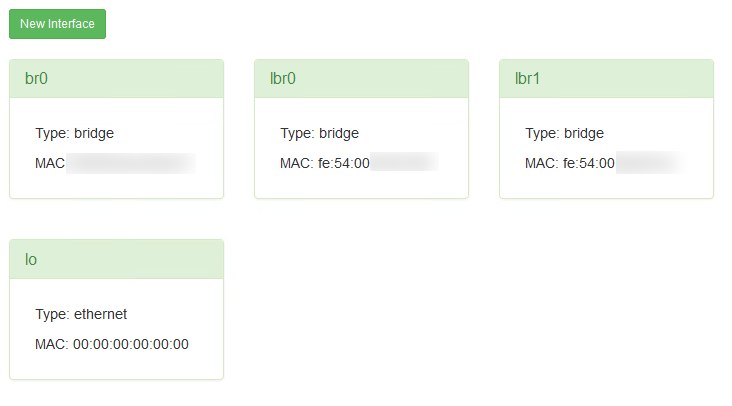
The interfaces section displays the configuration file /etc/networks/interface, where we'll find lo, br0, lbr0, lbr1.
But before configuring our bridge interfaces, let's look at the current configuration:
ifconfig
eth0      Link encap:Ethernet  HWaddr 08:60:6e:e5:bd:47
          inet adr:XX.XXX.XXX.XXXX  Bcast:XX.XXX.XXX.XXX  Masque:255.255.255.0
          adr inet6: XXXX:XXXX:X:XXXX::/xx Scope:Global
          adr inet6: XXXX::XXX:XXXX:XXXX:XXXX/xx Scope:Lien
          UP BROADCAST RUNNING MULTICAST  MTU:1500  Metric:1
          Packets reçus:2243 erreurs:0 :0 overruns:0 frame:0
          TX packets:1618 errors:0 dropped:0 overruns:0 carrier:0
          collisions:0 lg file transmission:1000
          Octets reçus:490019 (490.0 KB) Octets transmis:243883 (243.8 KB)

lo        Link encap:Boucle locale
          inet adr:127.0.0.1  Masque:255.0.0.0
          adr inet6: ::1/128 Scope:Hôte
          UP LOOPBACK RUNNING  MTU:65536  Metric:1
          Packets reçus:140 erreurs:0 :0 overruns:0 frame:0
          TX packets:140 errors:0 dropped:0 overruns:0 carrier:0
          collisions:0 lg file transmission:0
          Octets reçus:22966 (22.9 KB) Octets transmis:22966 (22.9 KB)

virbr0    Link encap:Ethernet  HWaddr 22:e2:0b:e7:c2:d1
          inet adr:192.168.122.1  Bcast:192.168.122.255  Masque:255.255.255.0
          UP BROADCAST MULTICAST  MTU:1500  Metric:1
          Packets reçus:0 erreurs:0 :0 overruns:0 frame:0
          TX packets:0 errors:0 dropped:0 overruns:0 carrier:0
          collisions:0 lg file transmission:0
          Octets reçus:0 (0.0 B) Octets transmis:0 (0.0 B)
We notice the following configuration: the eth0 interface which represents the server's public IP address, the (logical) loopback interface, as well as the virbr0 interface which is created automatically in NAT mode.
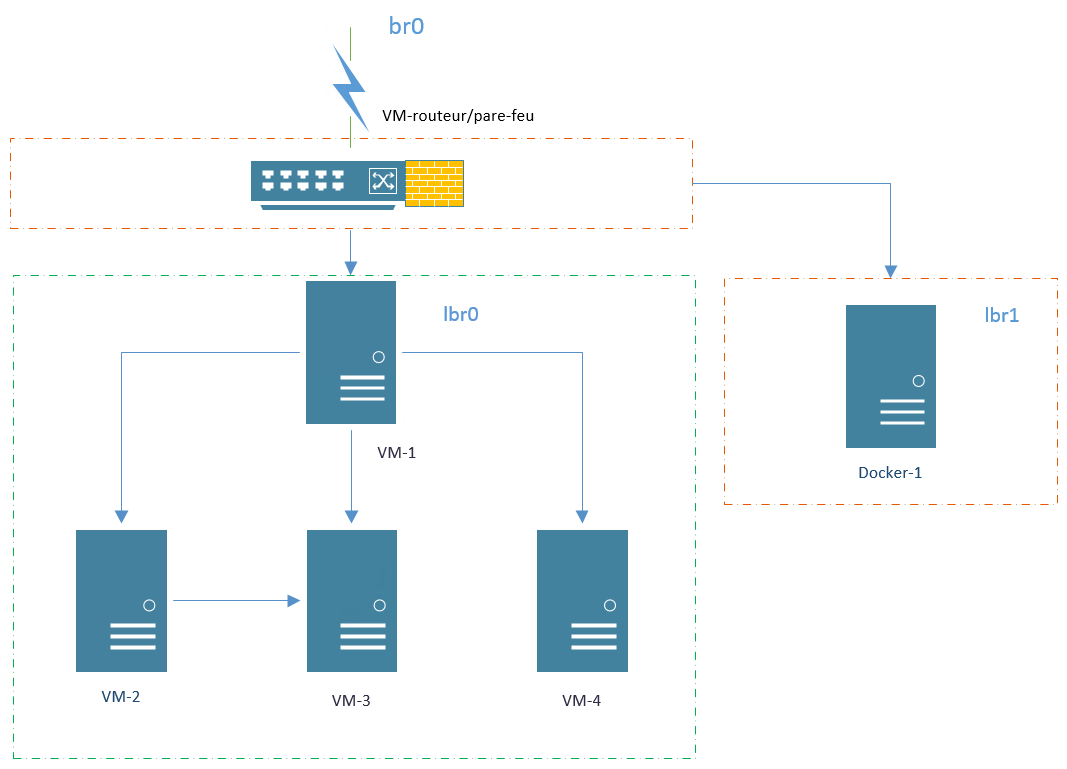
In setting up my infrastructure, networking has an important place. So I created three interfaces:
- br0 = bridged to the main eth0 interface of my Debian host (used for my OVH failover IPs).
- lbr1 = a bridge interface used by VyOS for my web services.
- lbr2 = a bridge interface used by VyOS for my Dockers and VMs, with the possibility of Docker/KVM interconnections.
My router/firewall manages my different br0, lbr1, lbr2 interfaces. Here's an illustration diagram:
Let's start by configuring the br0 interface: (Debian wiki)
auto lo
iface lo inet loopback

auto eth0
iface eth0 inet manual

auto br0
iface br0 inet static
        address XX.XXX.XXX.XXX
        netmask 255.255.255.0
        network XX.XXX.XXX.0
        broadcast XX.XXX.XXX.255
        gateway XX.XXX.XXX.254
        bridge_ports eth0
        bridge_stp off
        bridge_fd 0
        bridge_maxwait 0

iface eth0 inet6 static
        address XXXX:XXXX:X:XXXX::
        netmask 64
        post-up /sbin/ip -family inet6 route add XXXX:XXXX:X:XXXX:XX:XX:XX:XX dev eth0
        post-up /sbin/ip -family inet6 route add default via XXXX:XXXX:X:XXXX:XX:XX:XX:XX
        pre-down /sbin/ip -family inet6 route del default via XXXX:XXXX:X:XXXX:XX:XX:XX:XX
        pre-down /sbin/ip -family inet6 route del XXXX:XXXX:X:XXXX:XX:XX:XX:XX dev eth0
Restart the interface (your SSH connection to your server shouldn't be interrupted):
/etc/init.d/network restart
Check the bridge interface configuration on the host:
ifconfig br0
br0       Link encap:Ethernet  HWaddr 08:60:6e:e5:bd:47
          inet adr:XX.XXX.XXX.XXX  Bcast:XX.XXX.XXX.255  Masque:255.255.255.0
          adr inet6: XXXX::XXX:XXXX:XXXX:XXXX/xx Scope:Lien
          UP BROADCAST RUNNING MULTICAST  MTU:1500  Metric:1
          RX packets:2344432 errors:0 dropped:0 overruns:0 frame:0
          TX packets:1599970 errors:0 dropped:0 overruns:0 carrier:0
          collisions:0 lg file transmission:0
          RX bytes:9383508945 (8.7 GiB)  TX bytes:312106046 (297.6 MiB)
The command to view the bridged interface:
btctl show
br0             8000.08606ee5bd47       no              eth0
The bridge package lets us create our interfaces directly, such as:
brctl addbr lbr0
brctl addbr lbr1
Next, we need to start the bridged interfaces lbr0 and lbr1:
ip link set dev lbr0 up
ip link set dev lbr1 up
However, the libvirt method doesn't make our interfaces permanent! Add the two interfaces permanently:
nano /etc/network/interface
auto lbr0
iface lbr0 inet manual
    bridge_ports none
    bridge_stp off

auto lbr1
iface lbr1 inet manual
    bridge_ports none
    bridge_stp off
/etc/init.d/network restart
brctl show

br0             8000.08606ee5bd47       no              eth0
lbr0            8000.fe5400047801       no
lbr1            8000.fe54000a522b       no
virbr0          8000.000000000000       yes
The host server can now restart without fear of losing its configuration. Here are the different bridged interfaces:
You have the option to disable the interface at startup:
virsh net-autostart --disable default
Or even permanently remove the default interface:
virsh net-destroy default
Creating an instance in WebVirtMgr
In the instances section, click the New Instance button and several options are available to you.
- Custom instance, Template, or XML configuration file.
Below, you'll also find pre-defined templates numbered 1 to 6 that let you create an image.
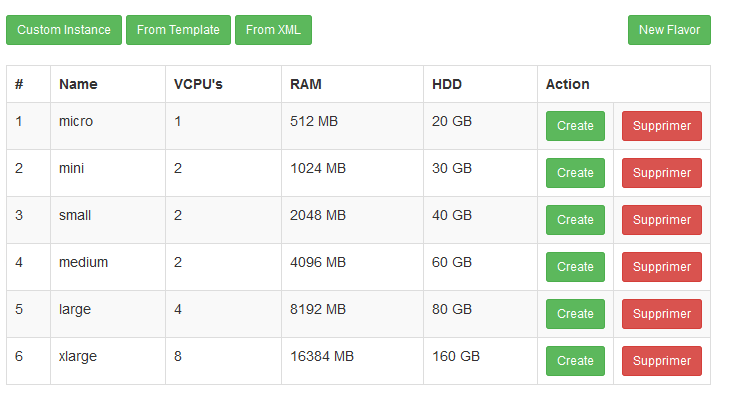
In this specific case, I'll use a custom instance. But first we'll need to create a disk for the VM.
As explained earlier, I prefer to use cli mode to create the disk for my future machine:
qemu-img create -f qcow2 vdisk 10G
For those who want to convert a VMware machine to KVM:
qemu-img convert vm1-flat.vmdk -O qcow2 vm1
Display information about our machine:
qemu-img info vdisk

file format: qcow2
virtual size: 10G (10737418240 bytes)
disk size: 136K
cluster_size: 65536
Now use the vdisk HDD to create a vdisk VM:
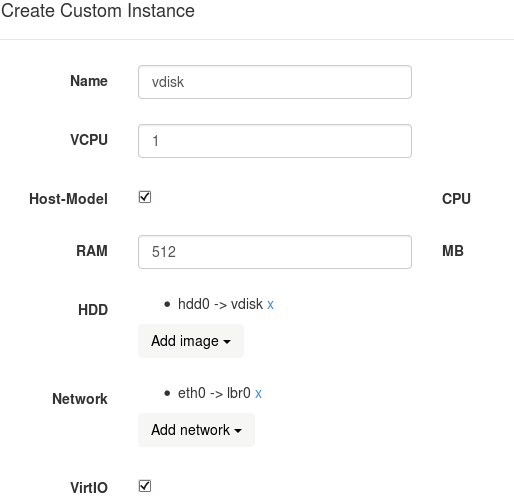
Start the creation by clicking the create button: the "vdisk" machine management appears with its options:
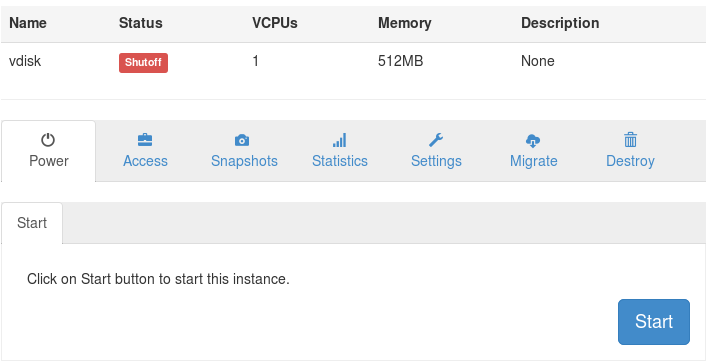
At this point, feel free to explore the sections above, but don't forget:
- "Access" to select your console type, then change the keyboard layout (if in novnc mode).
- "Settings" to add an ISO Media to the virtual machine.
- In "Settings", edit the vdisk machine's xml configuration. Only if you want to assign an OVH Failover IP to your VM. The interfaces section of the machine must contain (example on my router/firewall):bash
<interface type='bridge'> <mac address='xx:xx:xx:xx:xx:xx'/> <source bridge='br0'/> <target dev='vnet0'/> <alias name='net0'/> <address type='pci' domain='0x0000' bus='0x00' slot='0x03' function='0x0'/> </interface> - Starting the machine: Power then Start, access to the console is done via Access/Console
- A pop-up opens with novnc and access to the VM:
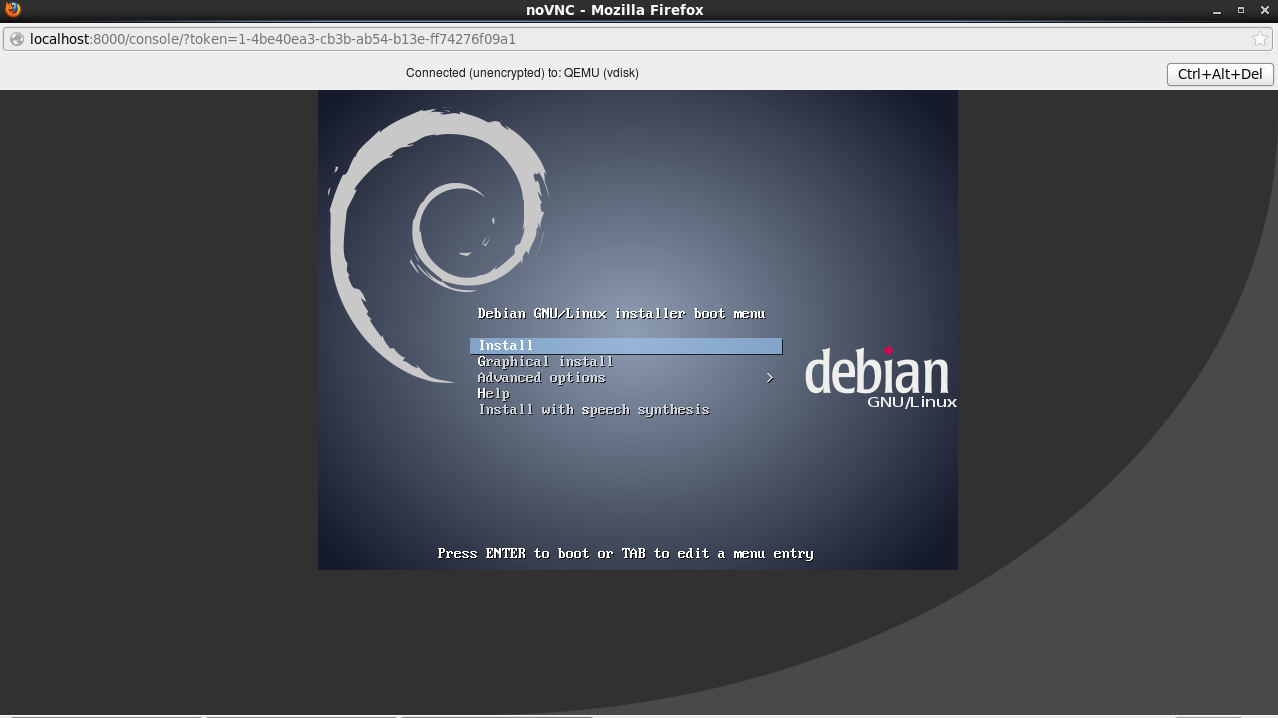
That's it, you're now ready to use your infrastructure's resources and your VM!
But first, back up your VM live.
Backing up your KVM machines live
The backup can be done by cloning via the webvirtmgr interface, or via a simple cp: (to NFS)
cp /var/lib/libvirt/images/vdisk /var/lib/libvirt/nfs/vdisk.02.03.2015
Infrastructure overview
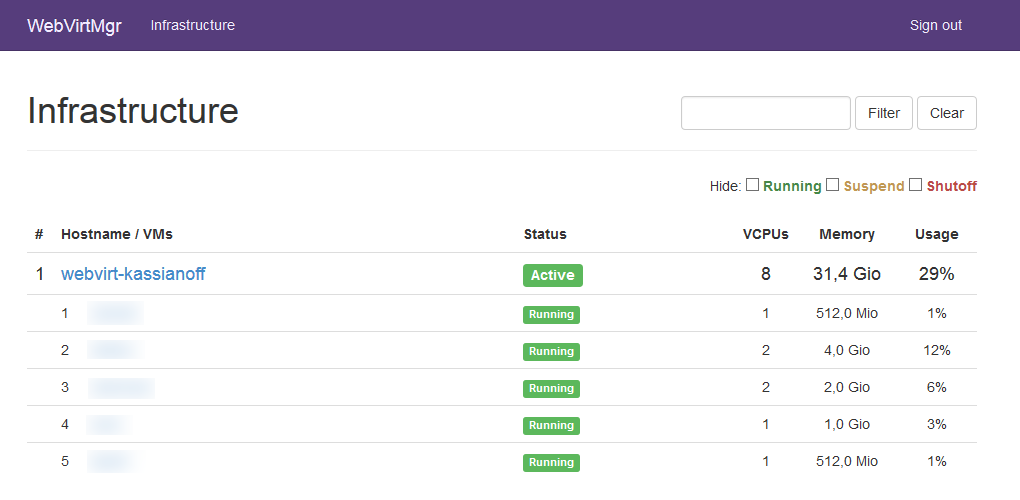
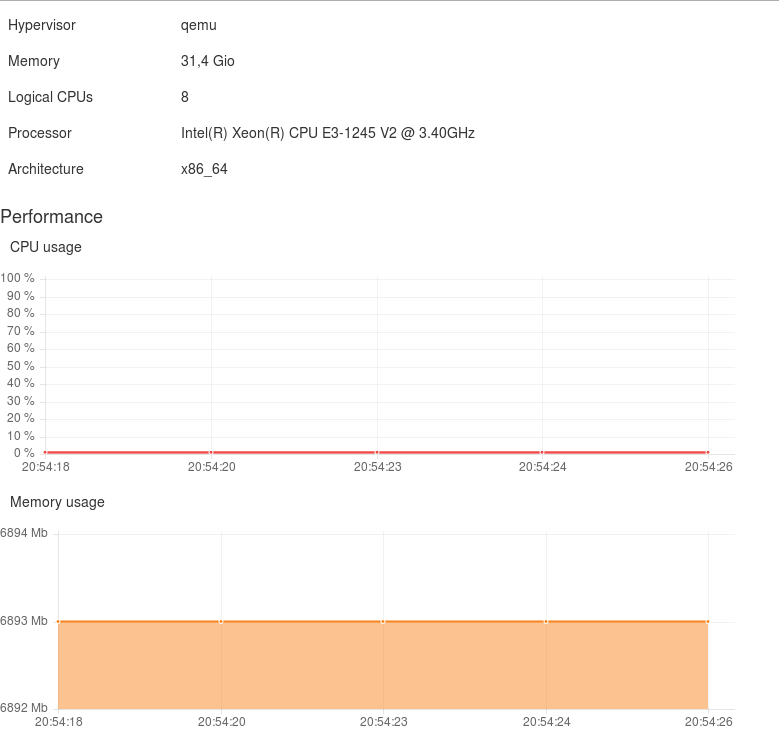
The infrastructure's usage load is available in the overview section, which provides a real-time overview. Here's the usage of my webvirt-kassianoff infrastructure once it's in place:
Updating WebVirtMgr
Technology and security updates are of course very important; nothing could be simpler:
Go to the WebVirtMgr directory:
cd /var/www/webvirtmgr
Then run the following commands:
 remote: Counting objects: 27, done.
remote: Compressing objects: 100% (14/14), done.
remote: Total 27 (delta 7), reused 6 (delta 6), pack-reused 7
Unpacking objects: 100% (27/27), done.
From git://github.com/retspen/webvirtmgr
   ed176e4..c875e0d  master     -> origin/master
Updating ed176e4..c875e0d
Fast-forward
 console/views.py         |    3 ++-
 create/views.py          |    7 ++++---
 hostdetail/views.py      |    5 +++--
 instance/views.py        |   15 ++++++++-------
 interfaces/views.py      |    7 ++++---
 networks/views.py        |    9 +++++----
 secrets/views.py         |    3 ++-
 servers/views.py         |    9 +++++----
 storages/views.py        |    9 +++++----
 templates/base.html      |    2 +-
 templates/base_auth.html |    2 +-
 templates/login.html     |    2 +-
 12 files changed, 41 insertions(+), 32 deletions(-)
./manage.py collectstatic
WARNING:root:No local_settings file found.

You have requested to collect static files at the destination
location as specified in your settings.

This will overwrite existing files!
Are you sure you want to do this?

Type 'yes' to continue, or 'no' to cancel: yes

0 static files copied, 75 unmodified.
service supervisor stop
I'm finishing my migration, and I hope you like your new infrastructure!
Conclusion
This article presented setting up a KVM/QEMU virtualization infrastructure managed by the WebVirtMgr web interface: installing the required packages, configuring the storage pools, networks and bridged interfaces, then creating and backing up an instance. This open-source, interoperable solution makes it easy to manage a KVM hypervisor without depending on a proprietary vendor, while retaining the flexibility of the Linux terminal for the most technical tasks. I hope this new infrastructure, closer to my Linux habits, keeps working well over time.