


ERA web console is ESET's administration tool for managing endpoints on the IT network.
Real-world use case
You've just installed ESET ERA and need to manage your endpoints day to day: here's getting started with the web console.
ERA Web console
The web console lets you administer ESET Remote Administrator. Getting to know the web console guides us through deploying our first installer during the startup wizard. Afterward, we'll learn how it works to administer, organize, and deploy ESET solutions within a network made up of Linux or Windows hosts.
Table of contents:
- The ESET Remote Administrator startup wizard
- The essential section: Admin
- Managing static and dynamic groups
- Deploying an agent on a Linux server
- Remotely installing an Endpoint Antivirus program
- Conclusion on the ERA web console product
The ERA startup wizard
Getting started with the Web Console product begins with a 6-step introduction, detailed below with images:
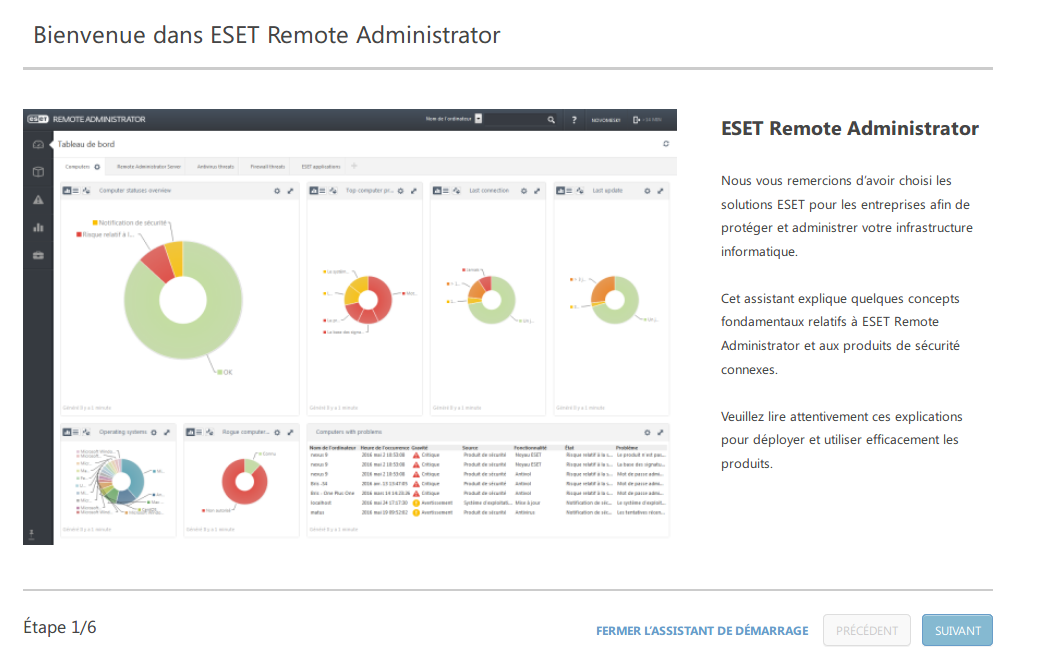
The wizard helps us understand how ERA WEB's main features fit together:
- Computers: computers report in via the ERA agent to be administered.
- Static Groups: a static group lets you manually add a computer inside it.
- Dynamic Groups: a dynamic group lets you add a computer based on specific criteria.
- Client Task: lets you send instructions to computers and schedule tasks with a trigger.
- ERA Agent: the agent handles all communications between compatible ESET products and the ERA server.
- ESET Endpoint: ESET's security product, used with the agent to be remotely controlled and configured.
- Deployment: lets you create an installer to deploy Endpoint to Windows.
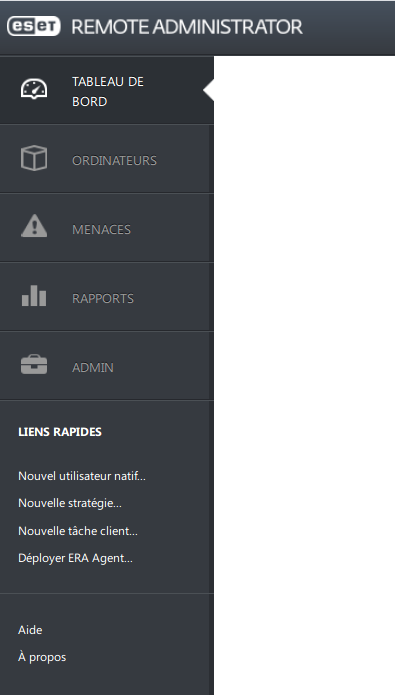
Once the wizard steps are done, we land on the Web interface with its different sections:
- Dashboard
- Computers
- Threats
- Reports
- Admin
Let's head to Admin in order to start getting hands-on with the web console.
The admin section
We're going to go through the configurations available to us by selecting Admin, then Status Overview, with its choices:
- Help and Support: full of educational videos along with a very good quality ESET knowledge base.
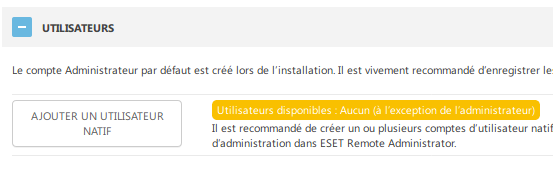
- Users: lets you create different users to configure their permissions in ERA.
- Certificates: creating certificate authorities and peer certificates for ERA components.
- Licenses: ESET Remote Administrator version 6 uses the ELA system to manage licenses.
- Computers: lets you add devices to groups in ESET Remote Administrator.
- Agents: lets you deploy an ERA agent to the network's client computers.
- Products: lets you install software directly from the ESET repository, or specify a path to a shared folder containing installation packages.
- SMTP Settings: let ESET ERA send email messages (notifications, reports…).
To start, here are the steps I invite you to discover and follow:
Discover the product with the ESET Remote Administrator knowledge base at the following link.
Creating a native user is recommended:
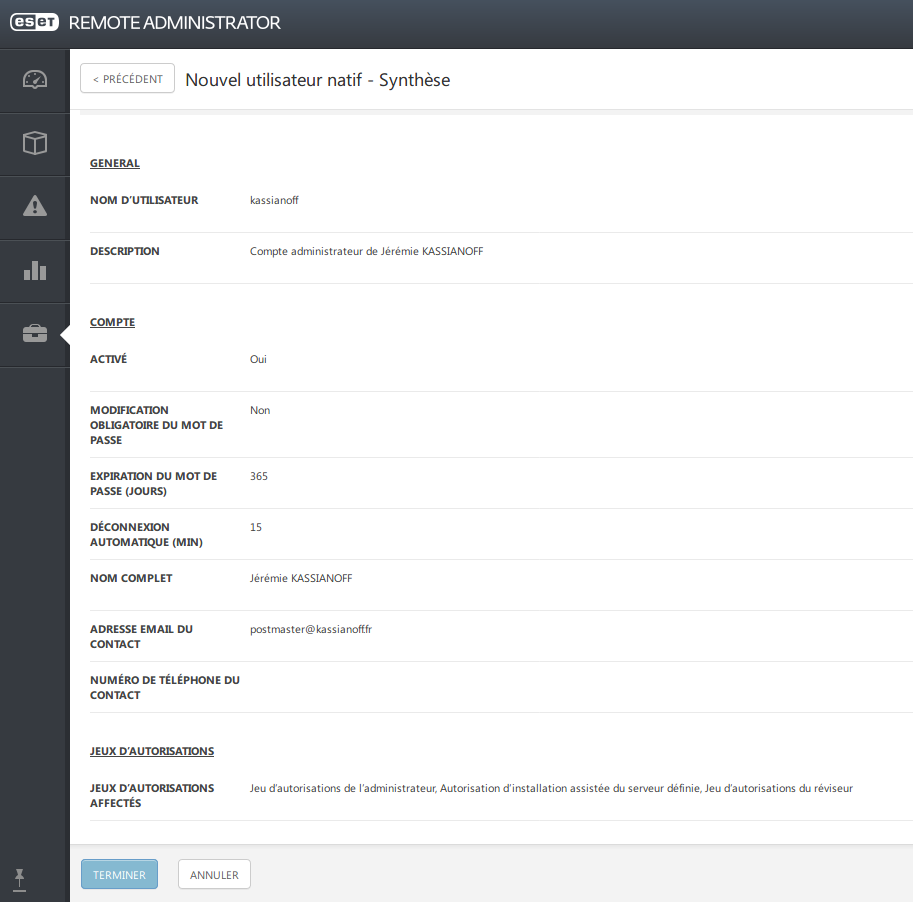
Let's add a native user other than Administrator, here, for example, is my summary:
Certificates have been present since ERA's installation was generated.
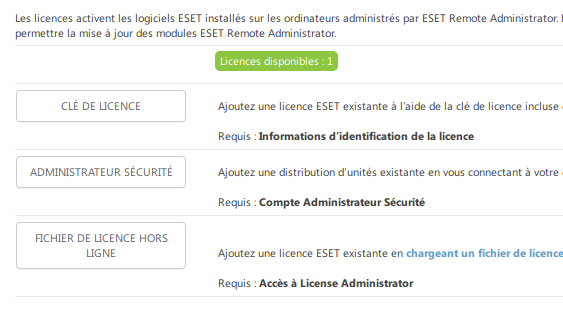
The license was, in my case, added during the installation, but it's possible to add more:
We'll arbitrarily jump straight to the SMTP settings so we can receive important alerts by email:

Under server settings and advanced settings, choosing the SMTP server is available, here's an example:
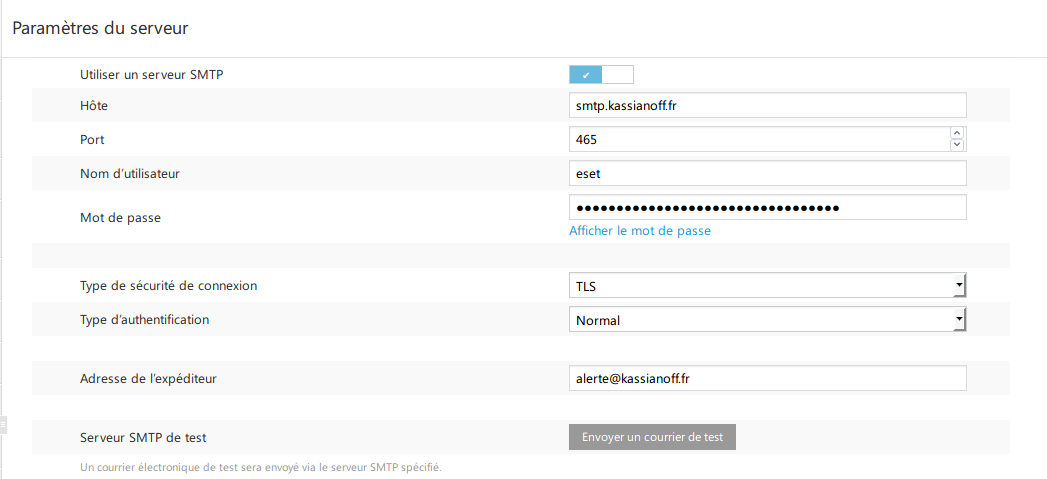
Once the proper configuration is done, the send-test-mail feature works.
Managing static and dynamic groups
Now, let's look at the Computers section, which by default contains static and dynamic groups with a parent named All, containing both types of groups organized into subgroups:
- Lost and found – (Static group, default when ERA agents first report in)
- Windows Computers – (Dynamic group)
- Linux Computers – (Dynamic group)
- Mac Computers – (Dynamic group)
- Computers with an outdated signature database – (Dynamic group)
- Computers with an outdated operating system – (Dynamic group)
- Problematic computers – (Dynamic group)
- Security product not activated
- Mobile devices, which contain two subgroups:
Android devices and iOS devices – (Dynamic group)
Keep the following rule in mind:
- A static group is only made up of a fixed name and description.
- A dynamic group is made up of a template that lets you classify the object based on its real-time status.
Group management is available under the Admin section, then Groups:
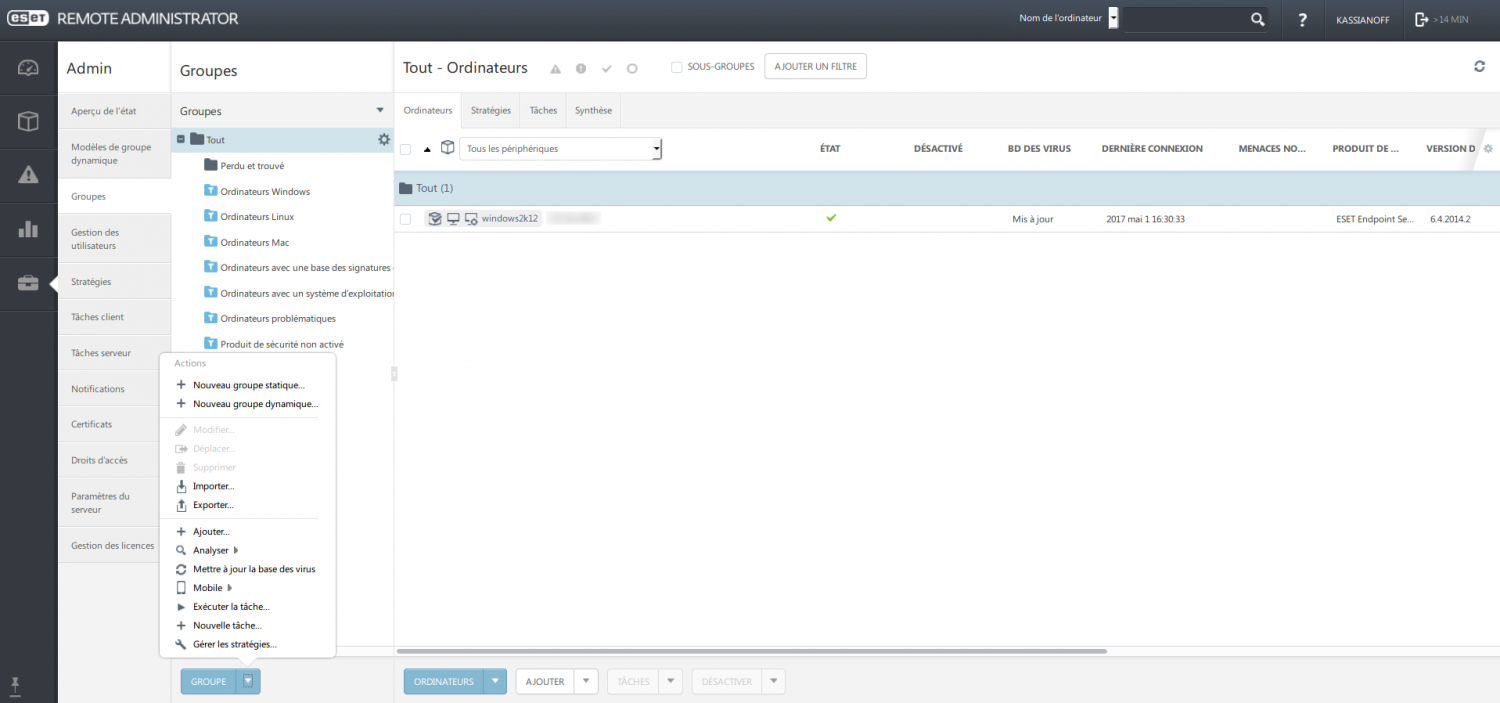
Let's click New Dynamic Group and discover creating a new dynamic group that will contain, for example, Linux web servers:
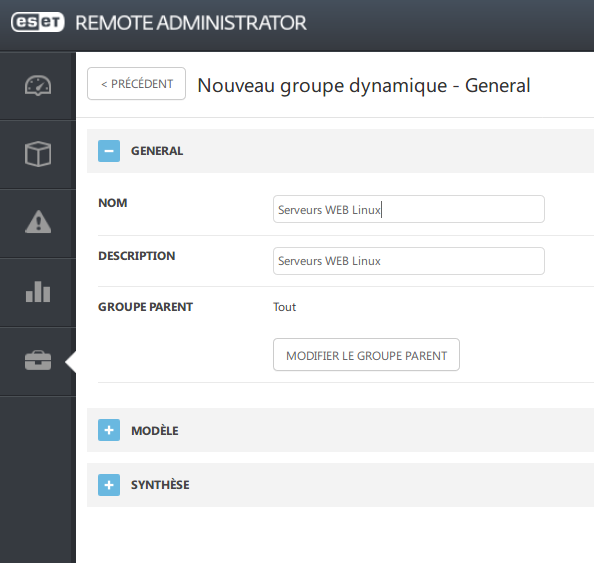
Then we get to choose the template that will make our group dynamic. Let's select New:
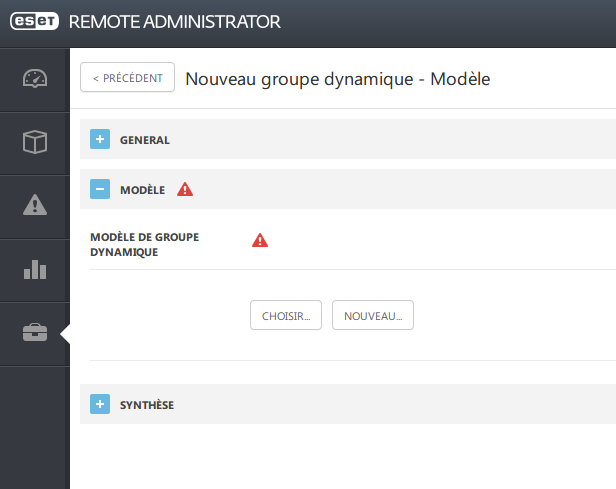
A template's configuration appears with two tabs: General and Expression.
The template's name and description will be under General, and the conditions to meet will be under Expression, such as:
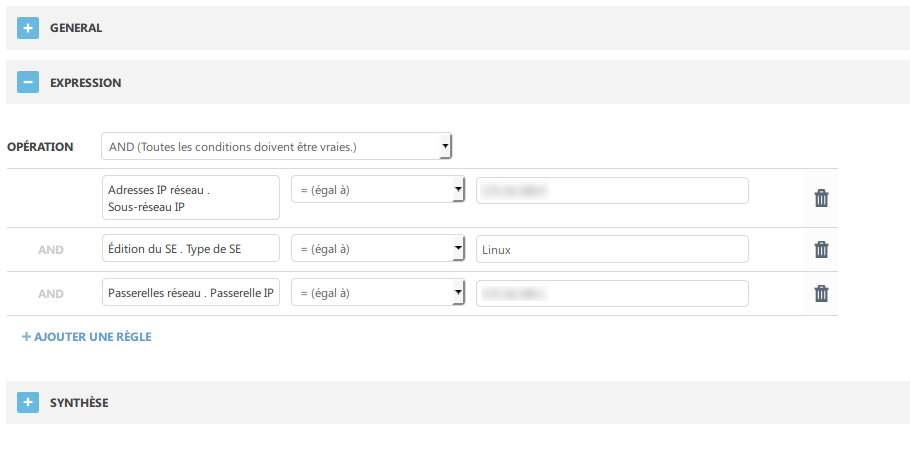
The idea is to group together the Linux Web Servers present in a specific subnet with a particular gateway.
From then on, every server that matches the conditions above will automatically be moved into the group: Linux WEB Servers.
Deploying an agent on a Linux server
A Linux server (with no interface) will be the ideal target for deploying to the ESET Endpoint Security solution.
Before starting to deploy an agent, it's necessary to understand the different deployment options available:
- Local deployment requires the x64 agent and exporting the certificates for this to happen on Linux.
- Remote deployment can be done via a server task in ERA, or via GPO or SCCM.
- Deployment via the Agent Live installer is used to distribute the Agent Live installer to the machine.
Local deployment
To deploy the agent locally and have our Linux server report directly into ERA, you first need to:
- Get the agent certificate (.pfx) and the authority certificate (.der). The export is done under the Certificates section.
Two subtabs appear, here's the example with the agent certificate:
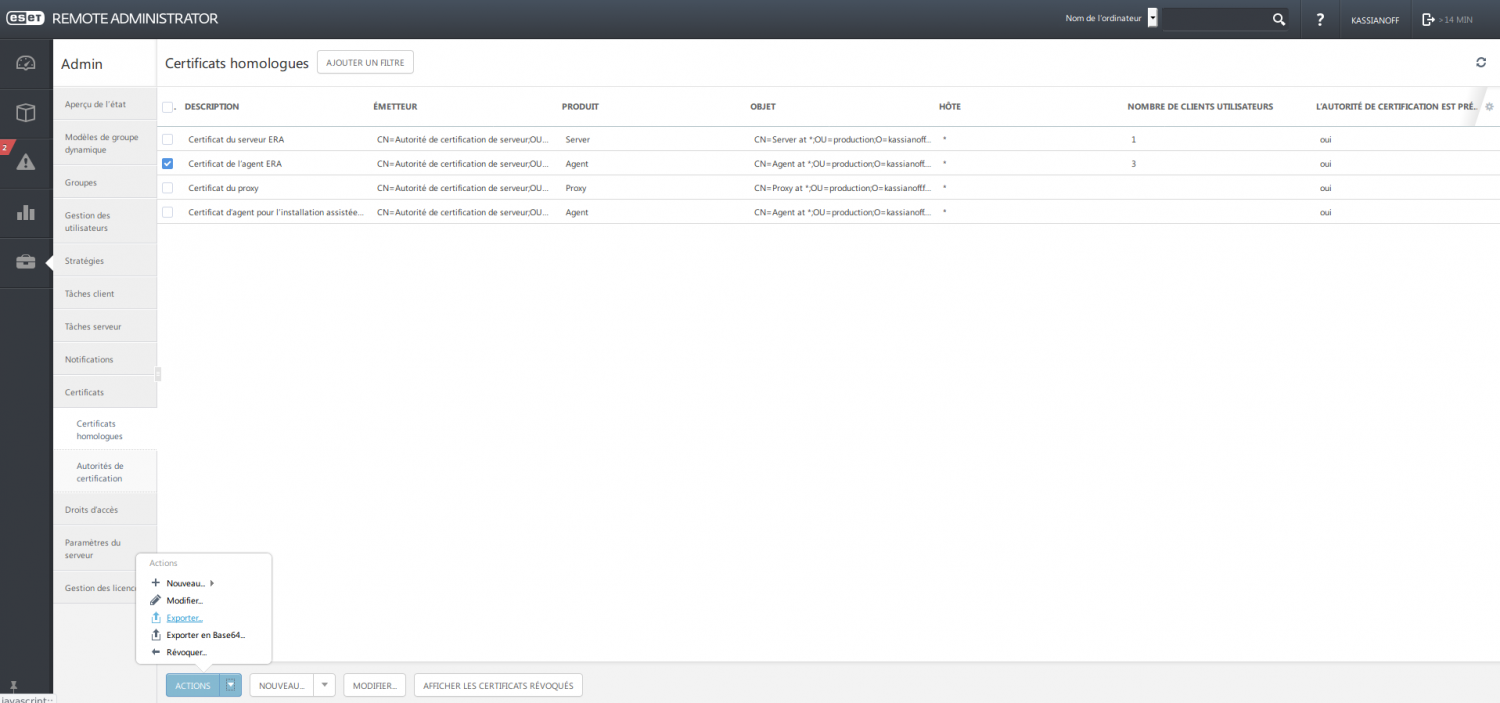
- For the authority certificate, it can be exported from Certification Authority.
- Once the certificates are exported, they need to be imported onto the Linux server (e.g.: haproxy).
- Download the ERA agent from the ESET website (as a script for Linux).
Before starting to deploy the agent on the Linux server, we need to make it executable:
chmod +x EraAgentInstaller.sh
On top of that, we need the libc6 package for the ESET program's future installation:
apt-get install libc6-i386
Otherwise you might run into the following error (on Debian 8):
systemctl status esets.service
esets.service - ESET Scanner Daemon
   Loaded: loaded (/lib/systemd/system/esets.service; enabled)
   Active: failed (Result: exit-code) since ven. 2017-04-28 16:01:04 CEST; 1min 4s ago
  Process: 468 ExecStart=/opt/eset/esets/sbin/esets_daemon (code=exited, status=69)

avril 28 16:01:03 haproxy systemd[1]: Starting ESET Scanner Daemon...
avril 28 16:01:04 haproxy esets_daemon[468]: error[01d40000]: Cannot initialize scanner: License not found
avril 28 16:01:04 haproxy systemd[1]: esets.service: control process exited, code=exited status=69
avril 28 16:01:04 haproxy systemd[1]: Failed to start ESET Scanner Daemon.
avril 28 16:01:04 haproxy systemd[1]: Unit esets.service entered failed state.
Then run the following command with the parameters: no license activation, with certificates, the ERA server and its communication port
./EraAgentInstaller.sh --skip-license --cert-path=/home/jeremie/era_agent/key_agent_ca.pfx
--cert-auth-path=/home/jeremie/era_agent/key_public_ca_kassianoff.fr.der
--hostname=172.16.230.2 --port=2222
In case of an OpenSSL error during the agent deployment, such as:
The archive will be extracted to: /opt/eset/RemoteAdministrator/Agent
Extracting, please wait...
Checking OpenSSL ... failure
: Error occurred while checking OpenSSL
You need to remove the following package:
apt-get remove libssl-dev:amd64
Once the Agent is installed, the eraagent service can be run like this:
service erraagent start
We'll now find our Linux server on ERA's web interface, under the Computers section.
Deploying an agent on a Windows server
On Windows, this is documented starting from installing the product with the ESET Remote Administrator startup wizard (the package generated at the end of the process includes the agent and the security suite). Remote deployment via GPO is detailed at this link. I won't detail the procedure, which will be the subject of another article.
Remotely installing the Endpoint Antivirus
To remotely install a package: head to the Admin section, then Client Task.
Let's choose New at the bottom and fill in the fields:
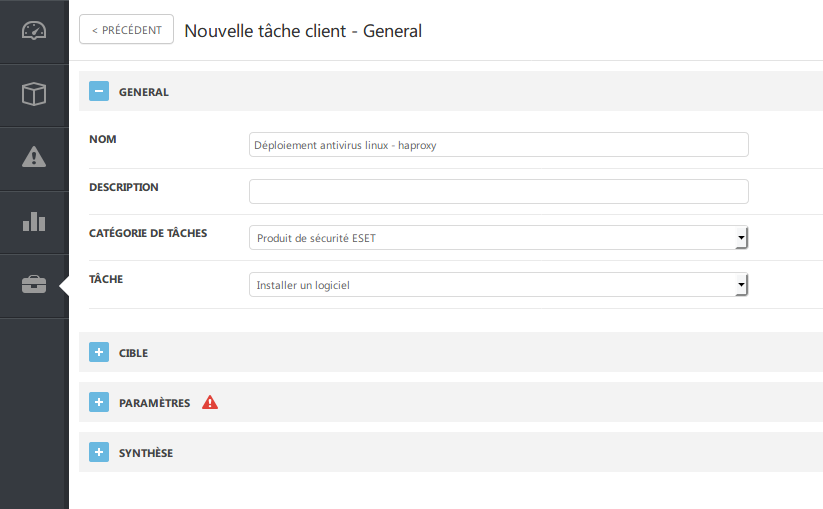
Targets can only be added after this task is created, so let's go straight to Settings:
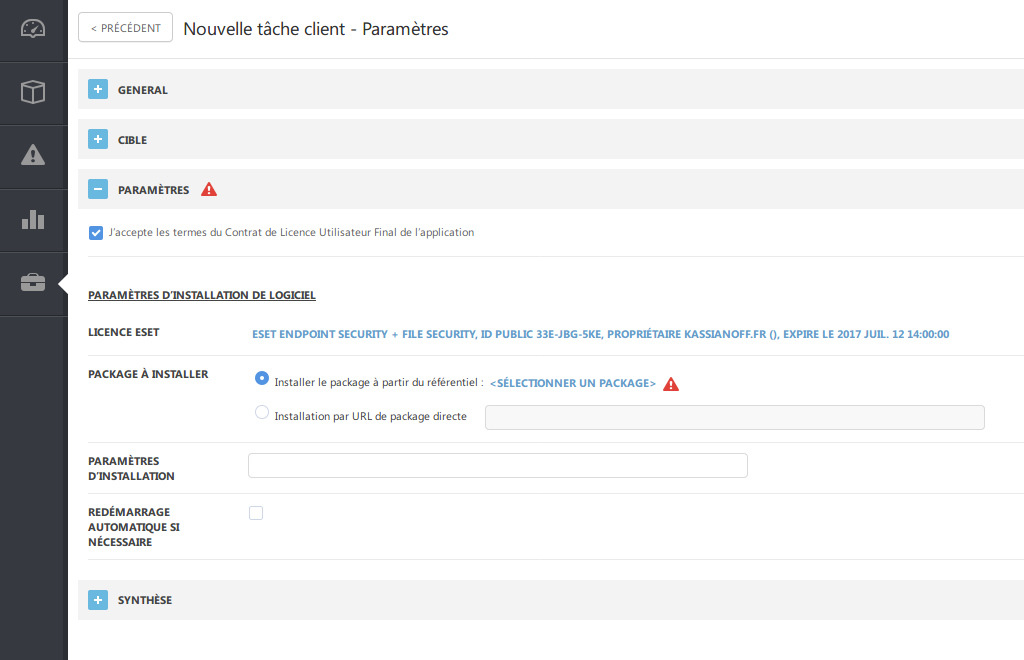
Once the terms of agreement and the ESET license are validated, we need to select the package to deploy:
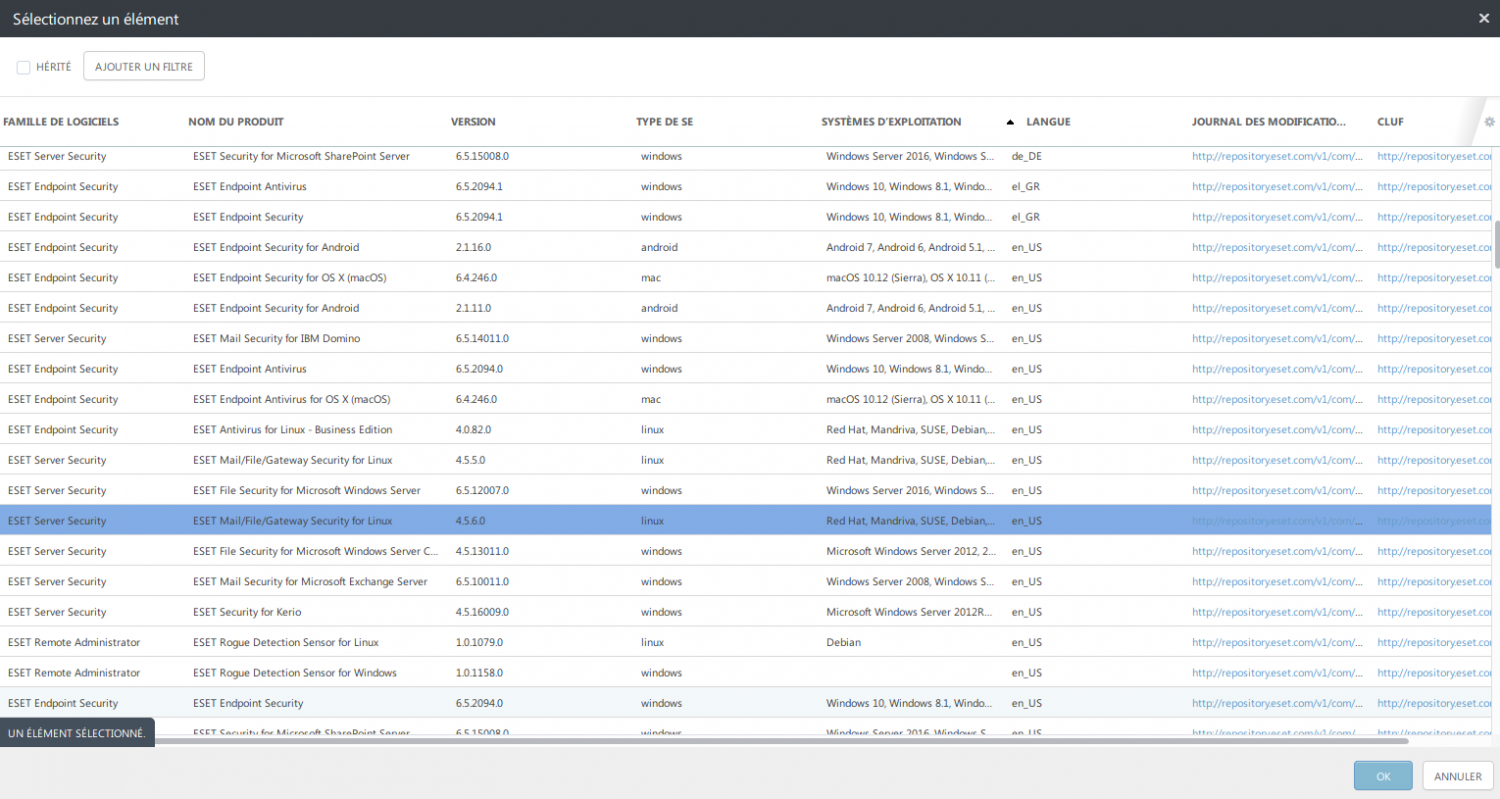
The list is quite long, since it groups together all ESET software in several languages compatible with ERA.
For my choice, I don't have a graphical interface (GTK), so Eset Server Security for mail/gateway is selected.
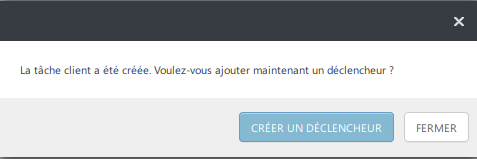
Let's finish creating the task, but a request to create a trigger appears:
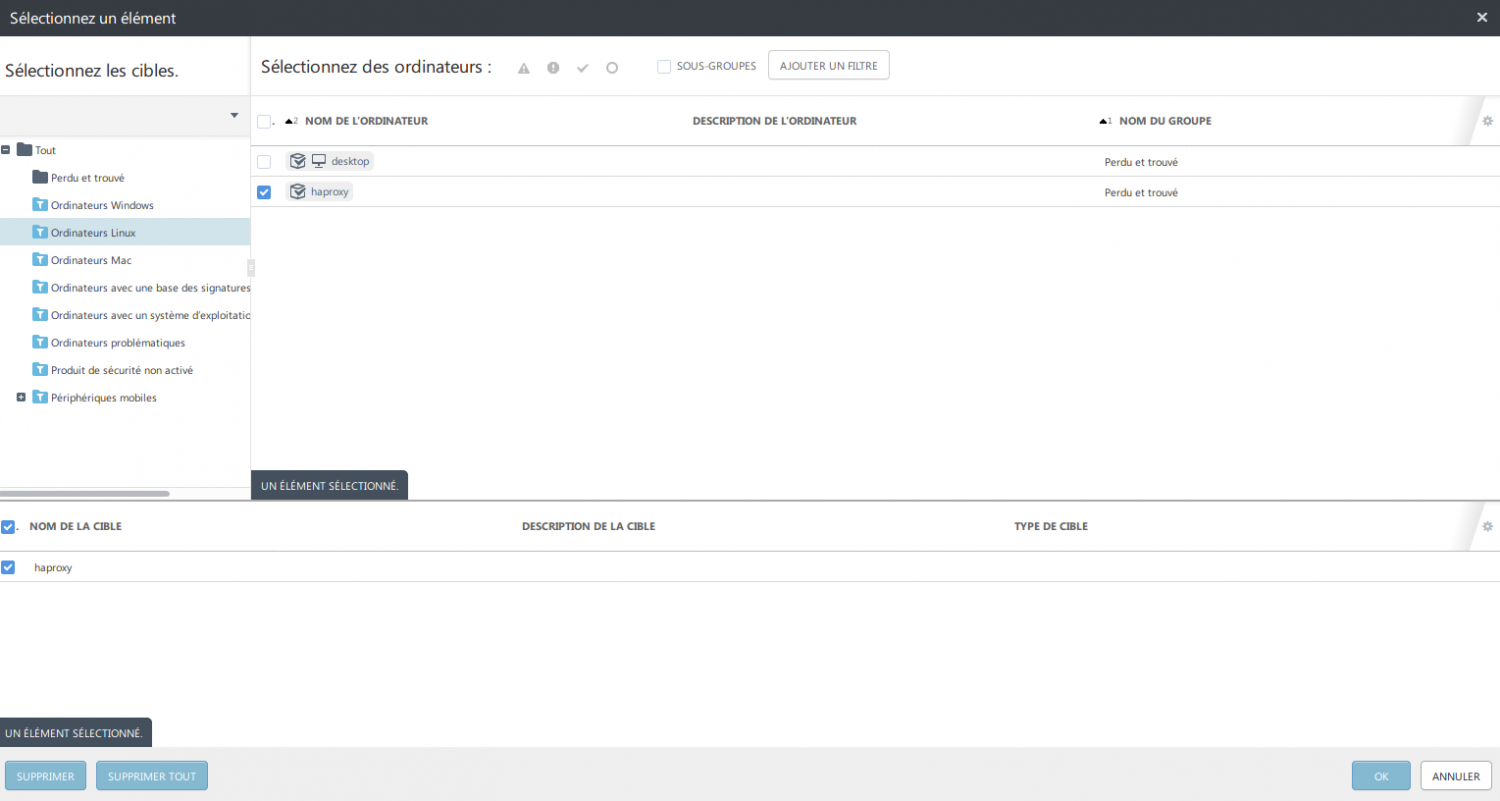
The trigger creation procedure is similar to creating a task, except that, in addition to the trigger's description, you need to select the target (in our case, our haproxy server):
Finally, we need to set the trigger to fire as soon as possible in order to continue the deployment:
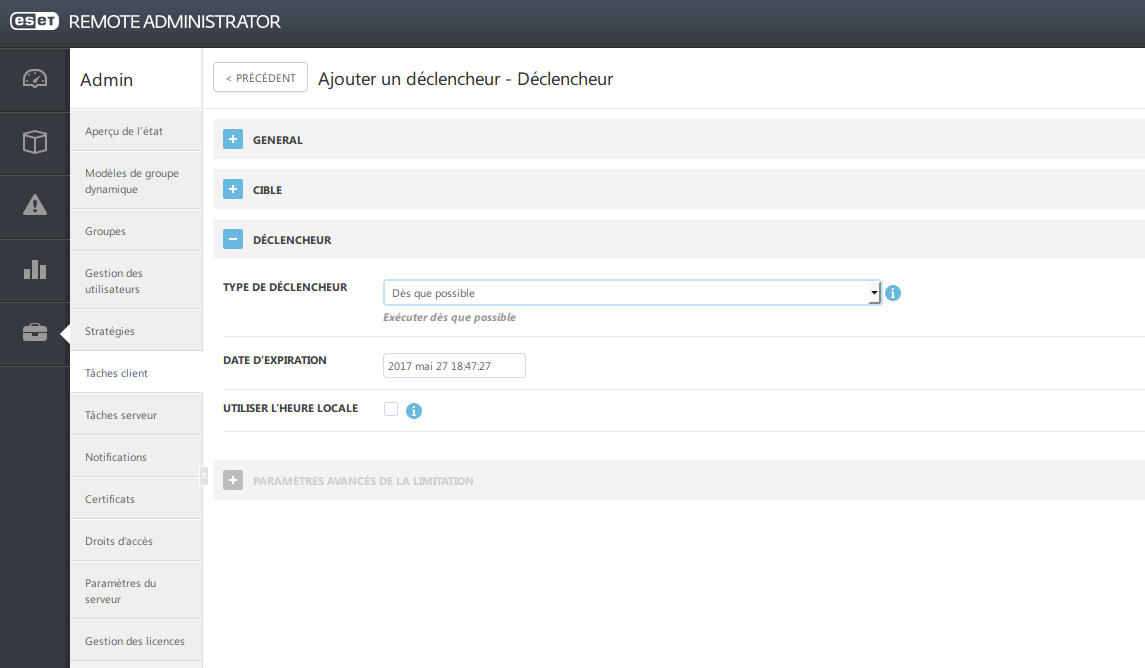
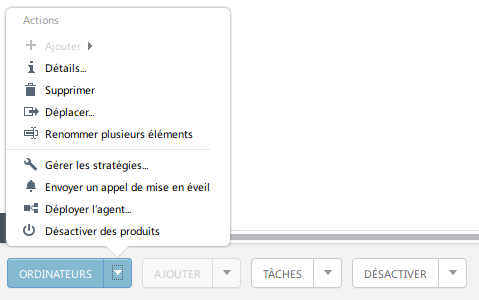
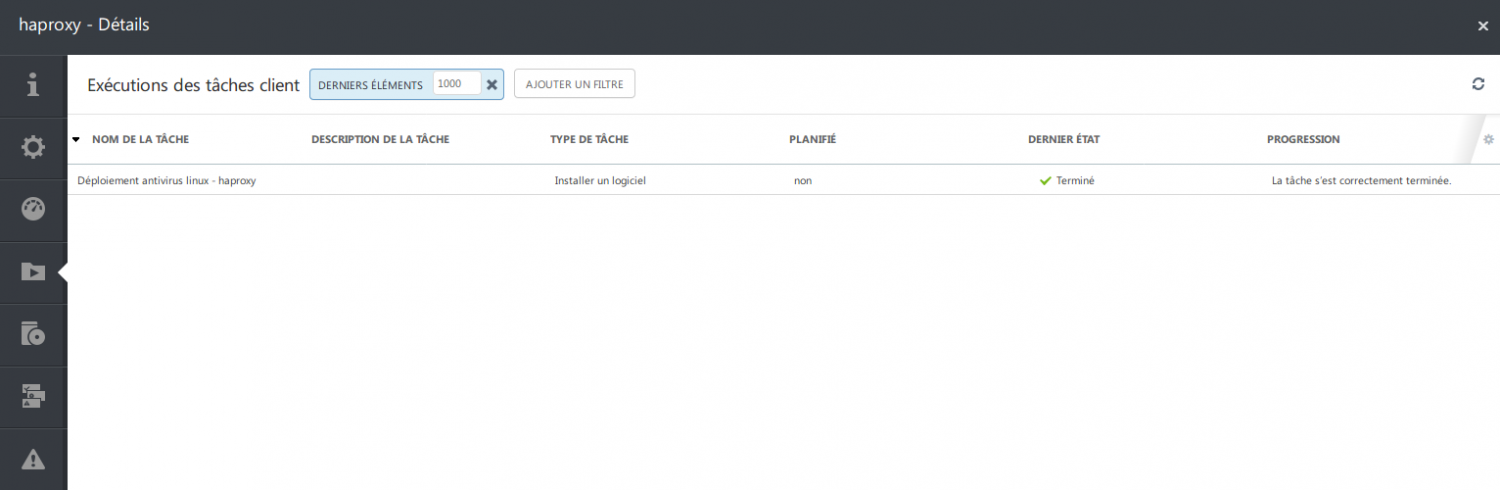
Once confirmed with Finish, the trigger is created and so is the task. To check the deployment status of the ESET solution, let's head to the Computers section, then to Haproxy (checked), and at the bottom, Computers, then Details:
The result should look like this:
Let's head to our Haproxy machine via SSH to check that the program is properly installed.
The product's installation path is:
cd /opt/eset/esets/sbin/
If you didn't include the license during deployment, you can do it like this:
/esets_lic --import file.lic
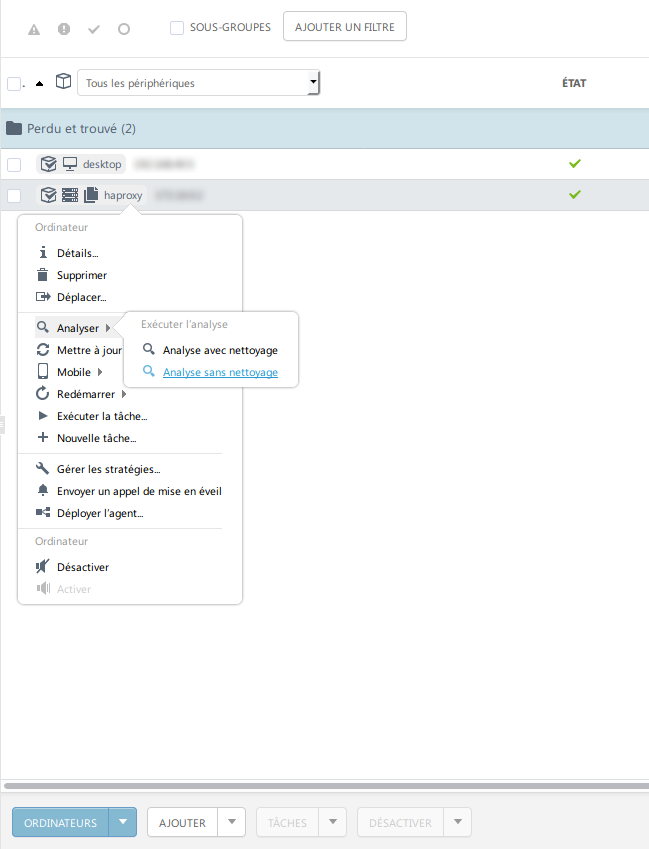
The deployment is complete, you can spontaneously run a scan without cleaning:
From this point, the computer will move into a dynamic group if one exists, as seen earlier.
The server becomes fully manageable by ERA to strengthen its security: policies and threat reports can be set up.